> ## Documentation Index
> Fetch the complete documentation index at: https://docs.origincloud.com.cn/llms.txt
> Use this file to discover all available pages before exploring further.

# 快速上手

> 10 分钟完成从注册到训练的完整流程

## 1. 注册与登录

### 注册账号

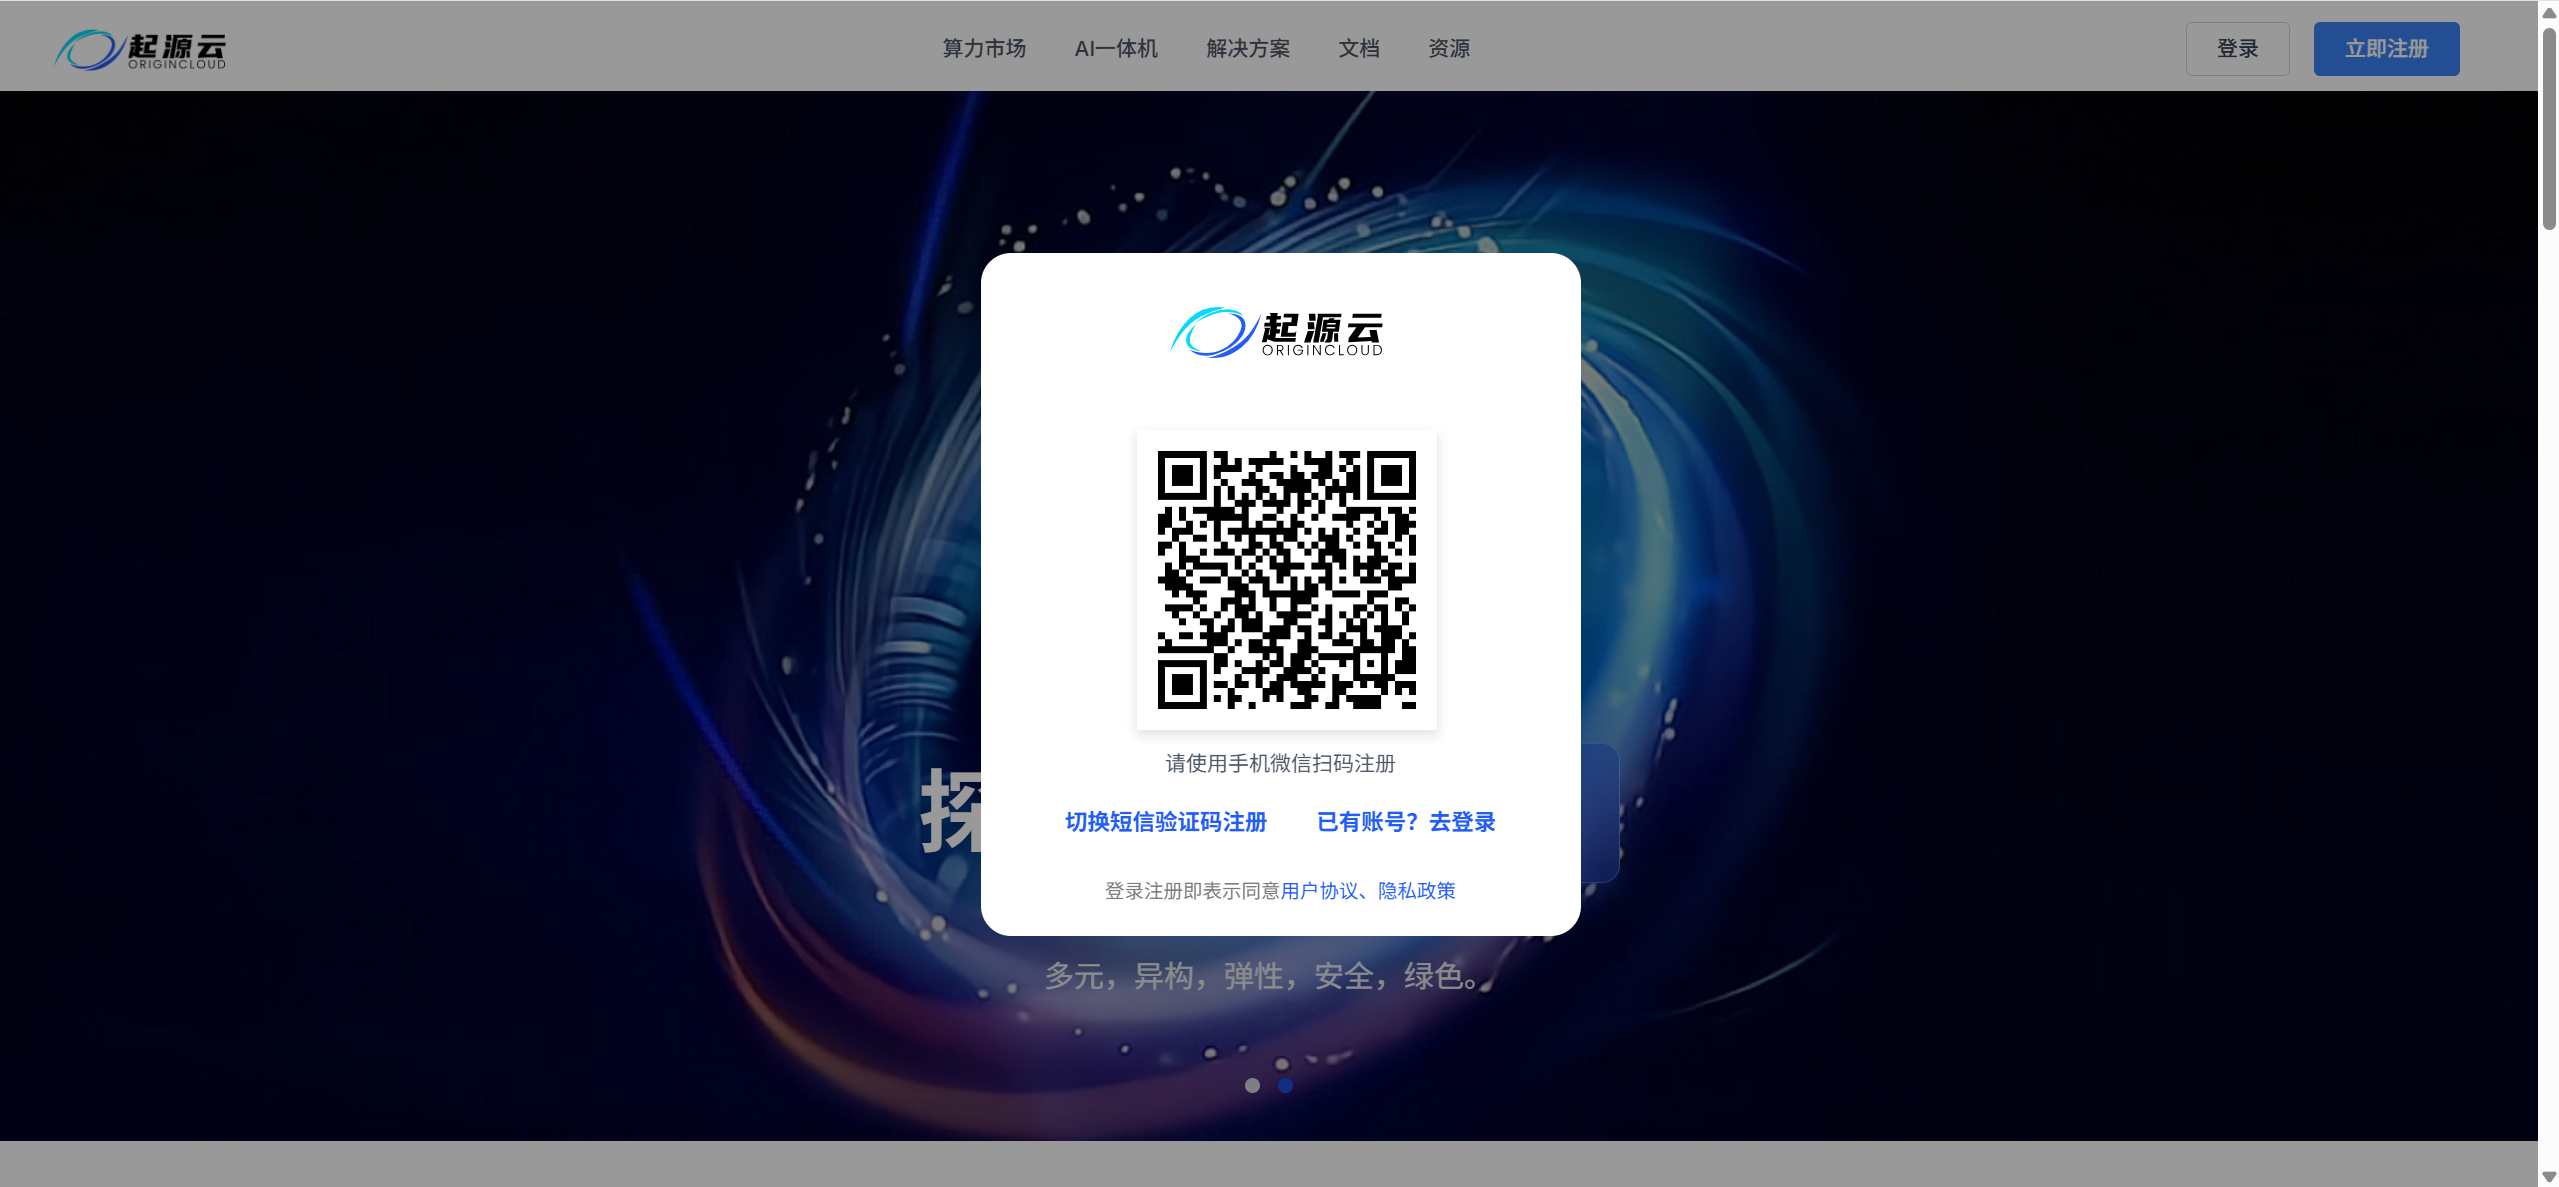
访问 [起源云官网](https://origincloud.com.cn)，点击"注册"按钮。

支持手机号或微信扫码注册。

<p align="center">
  <img src="https://mintcdn.com/oritime-ce96dd27/tgVeiLm4bSwlyb-9/images/register.png?fit=max&auto=format&n=tgVeiLm4bSwlyb-9&q=85&s=503c95d358a3e516c964f94f67593561" alt="注册页面" width="600" data-path="images/register.png" />
</p>

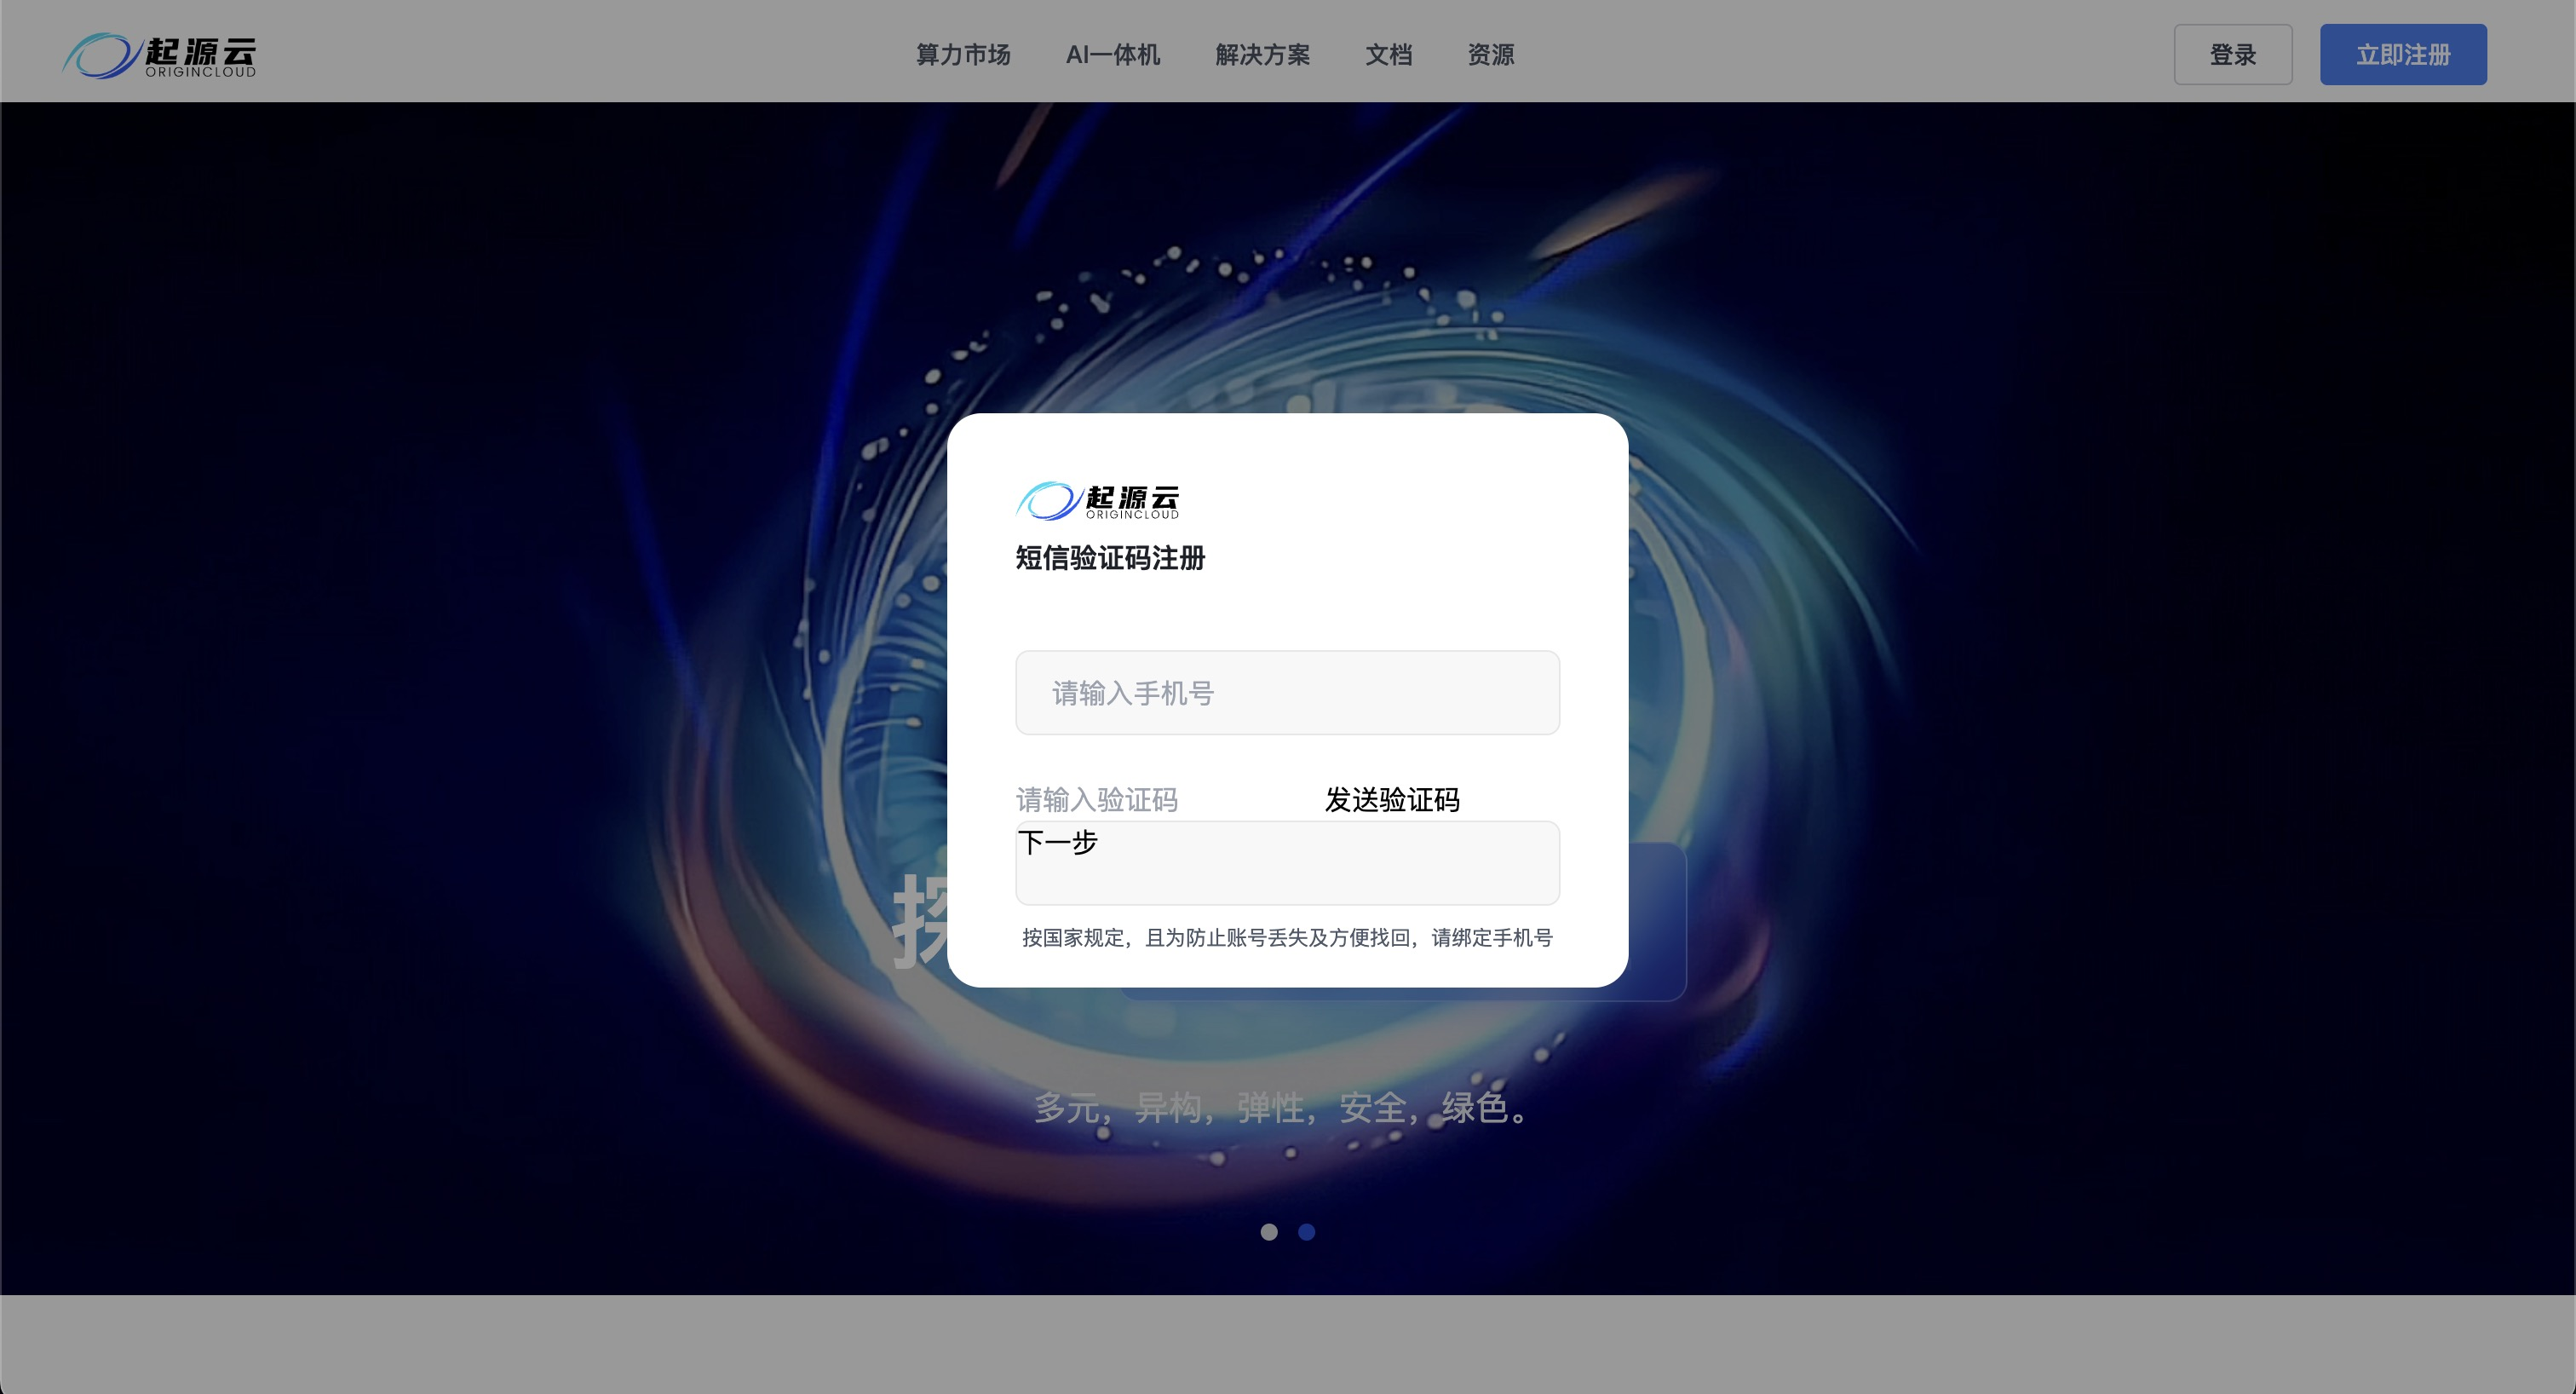
首次微信扫码注册的用户，需绑定手机号。

<p align="center">
  <img src="https://mintcdn.com/oritime-ce96dd27/tgVeiLm4bSwlyb-9/images/bindphone.png?fit=max&auto=format&n=tgVeiLm4bSwlyb-9&q=85&s=79f360ba9d4b45426ecf0b0f9605fee8" alt="绑定手机号" width="600" data-path="images/bindphone.png" />
</p>

### 登录

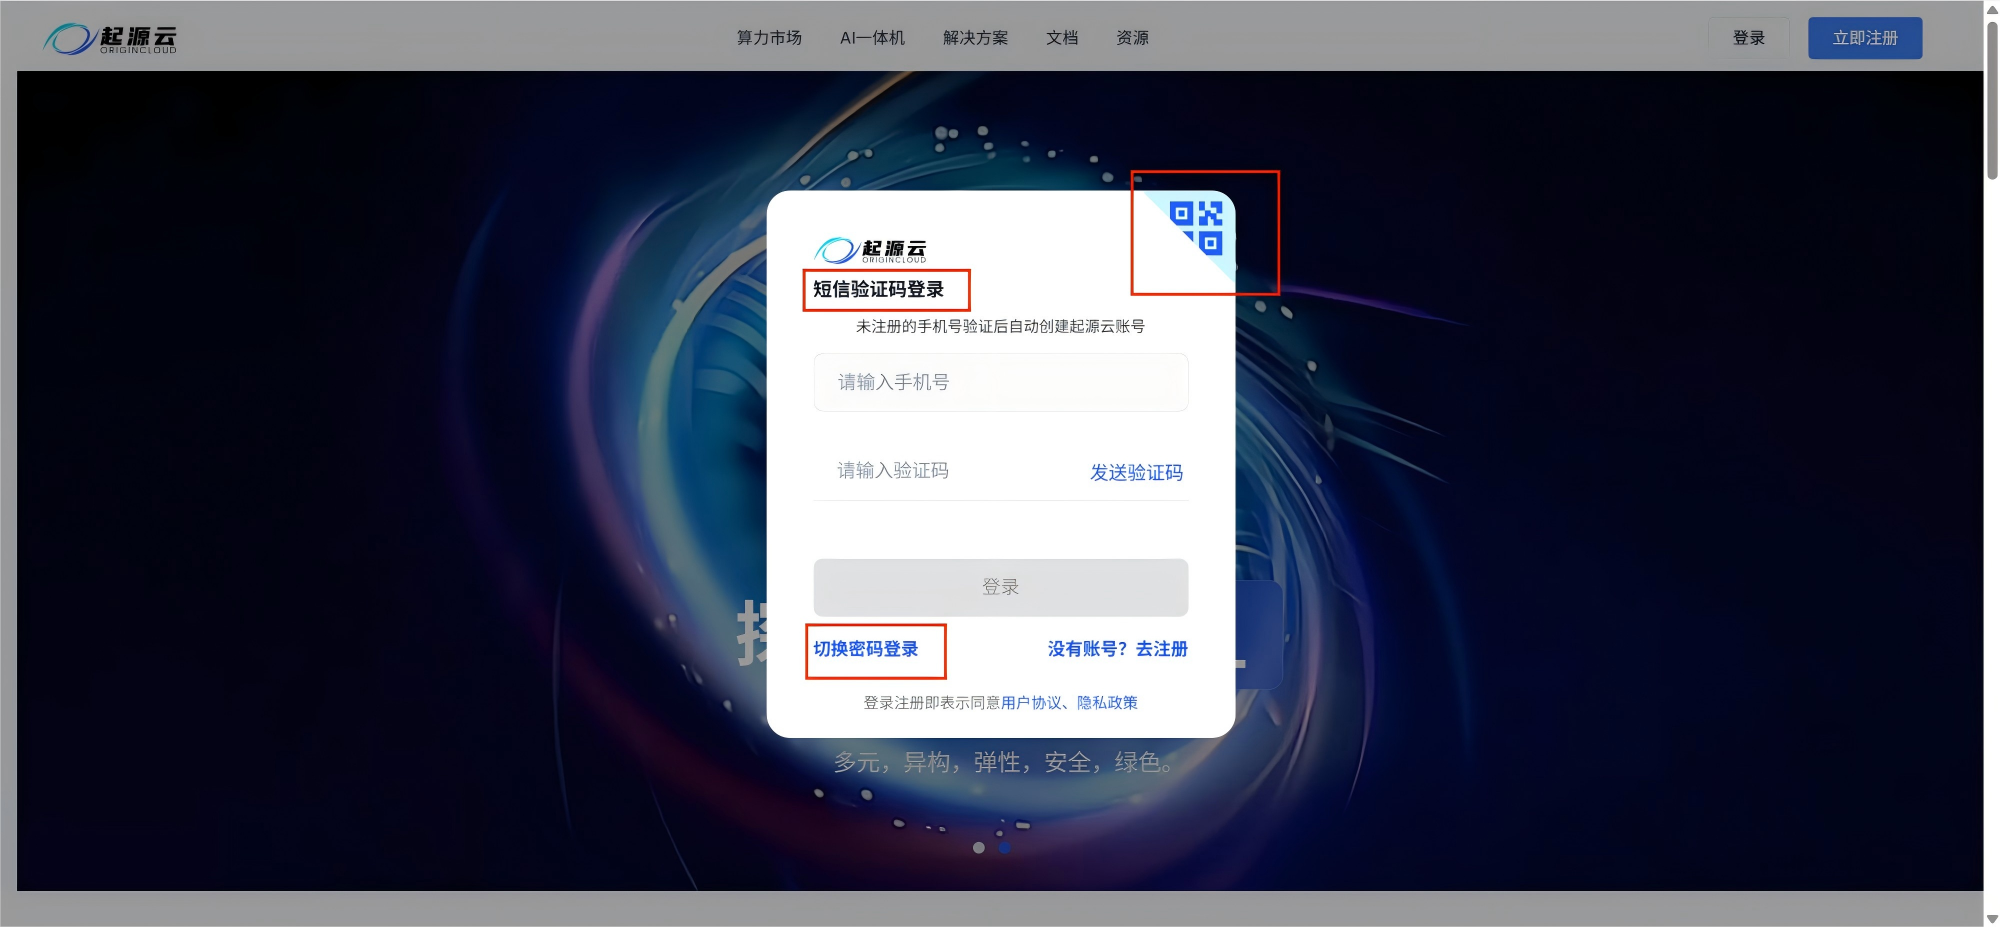
注册完成后，之后可以使用手机号/邮箱和密码或微信扫码登录。（p.s. 邮箱密码登录需提前([绑定邮箱](/security/account))
<p align="center">
  <img src="https://mintcdn.com/oritime-ce96dd27/tgVeiLm4bSwlyb-9/images/login.png?fit=max&auto=format&n=tgVeiLm4bSwlyb-9&q=85&s=564ac1e53206643fec4026569d59db43" alt="登录页面" width="600" data-path="images/login.png" />
</p>

### 领取新人福利

首次登录后，系统自动赠送 **5 元**体验金。

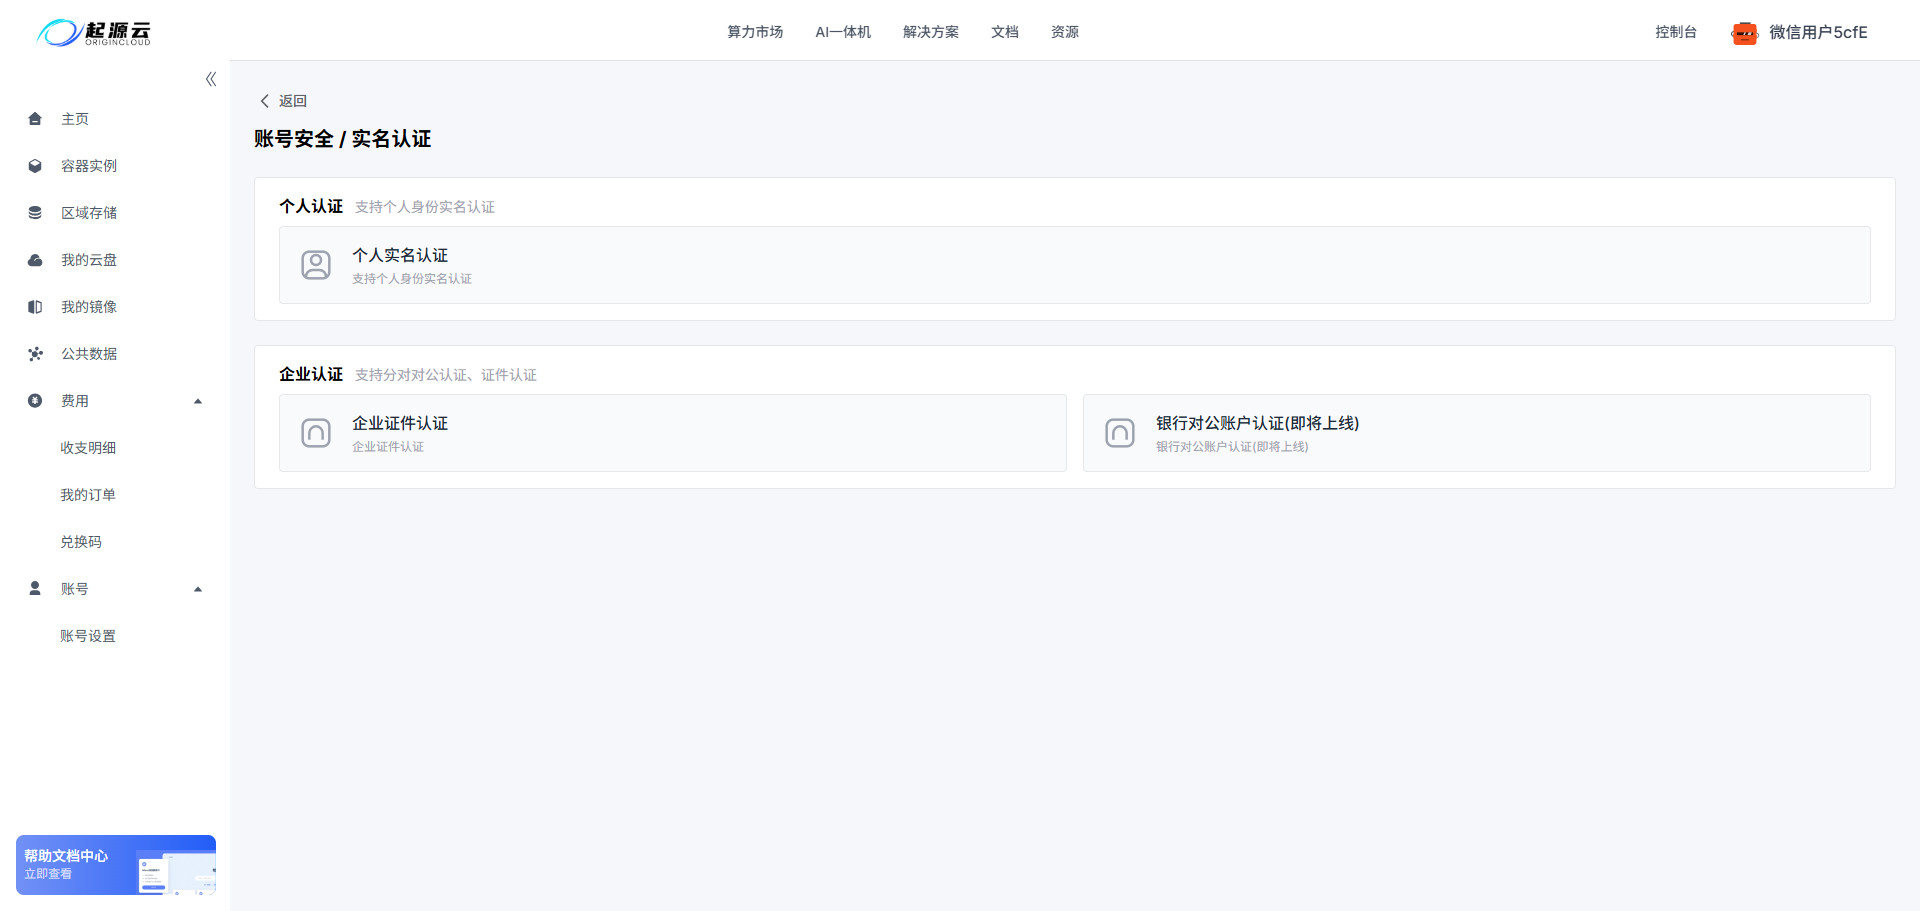
完成实名认证，再送 **5 元**（总计 10 元）。

<p align="center">
  <img src="https://mintcdn.com/oritime-ce96dd27/tgVeiLm4bSwlyb-9/images/realname.png?fit=max&auto=format&n=tgVeiLm4bSwlyb-9&q=85&s=5f1f399b11e5c2a792fb95401e56f70c" alt="实名验证" width="600" data-path="images/realname.png" />
</p>

***

## 2. 创建实例

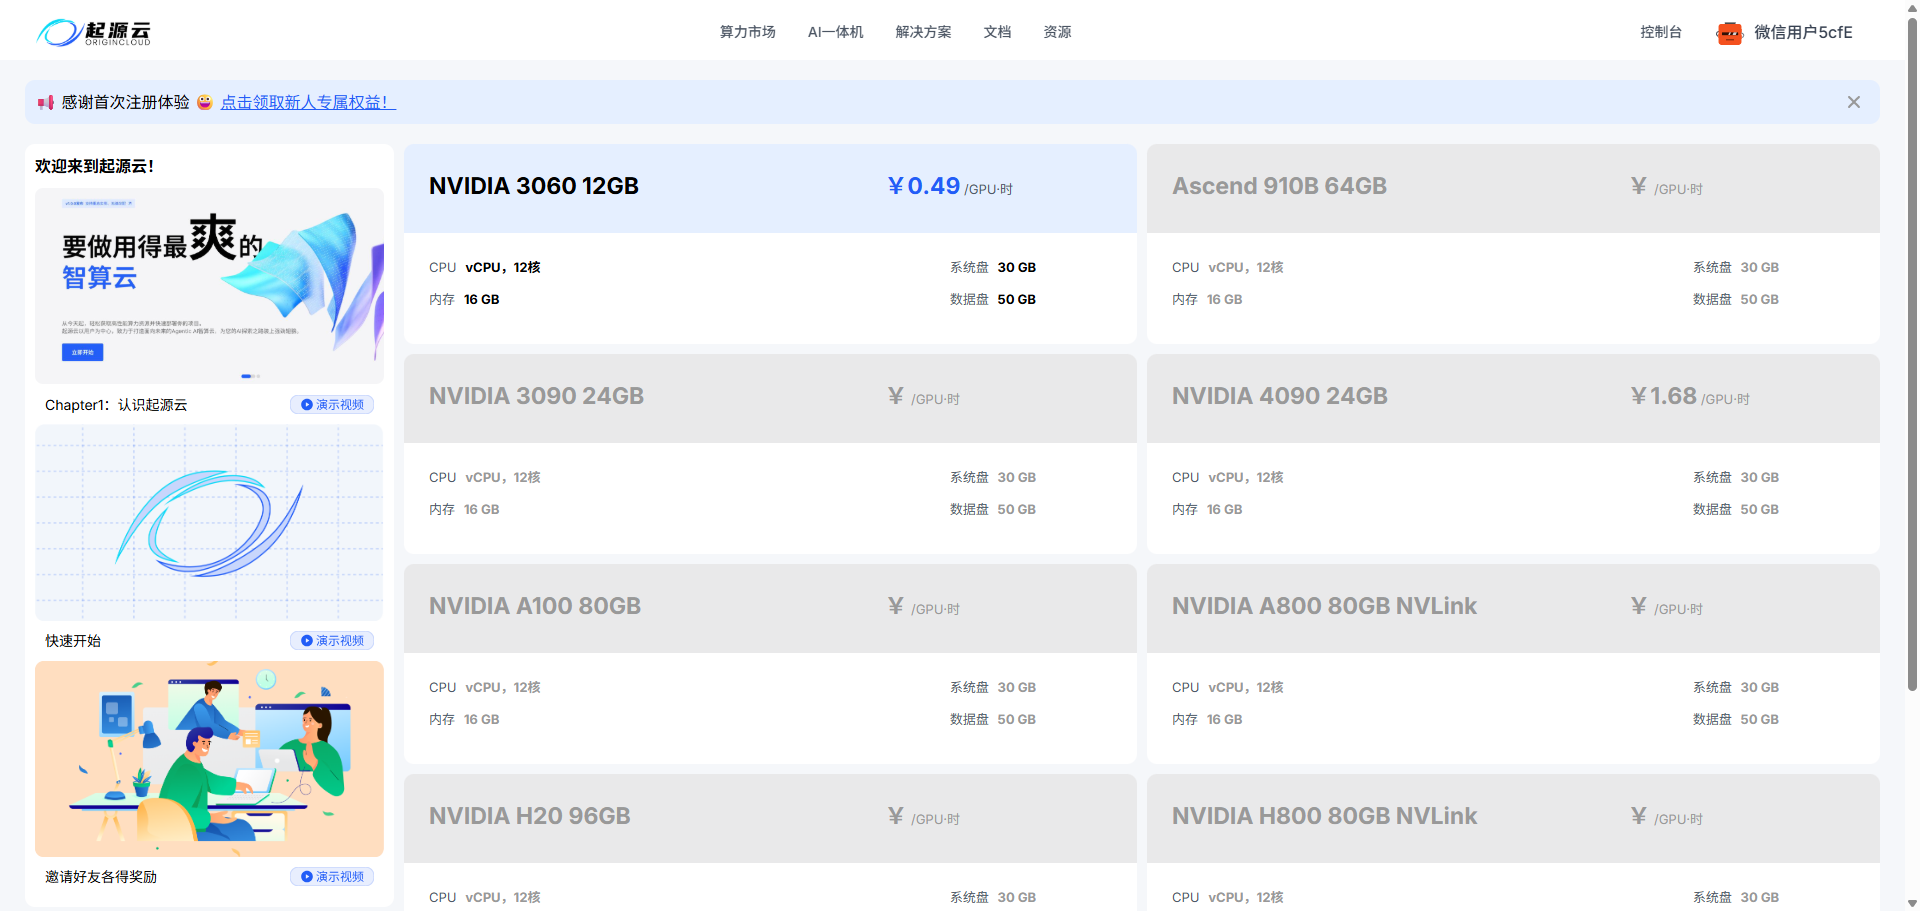
点击顶部导航栏的"算力市场"，进入创建实例页面。

<p align="center">
  <img src="https://mintcdn.com/oritime-ce96dd27/tgVeiLm4bSwlyb-9/images/market-entrance.png?fit=max&auto=format&n=tgVeiLm4bSwlyb-9&q=85&s=c74ad61c94d183f0d960f5197af1cb00" alt="算力市场入口" width="800" data-path="images/market-entrance.png" />
</p>

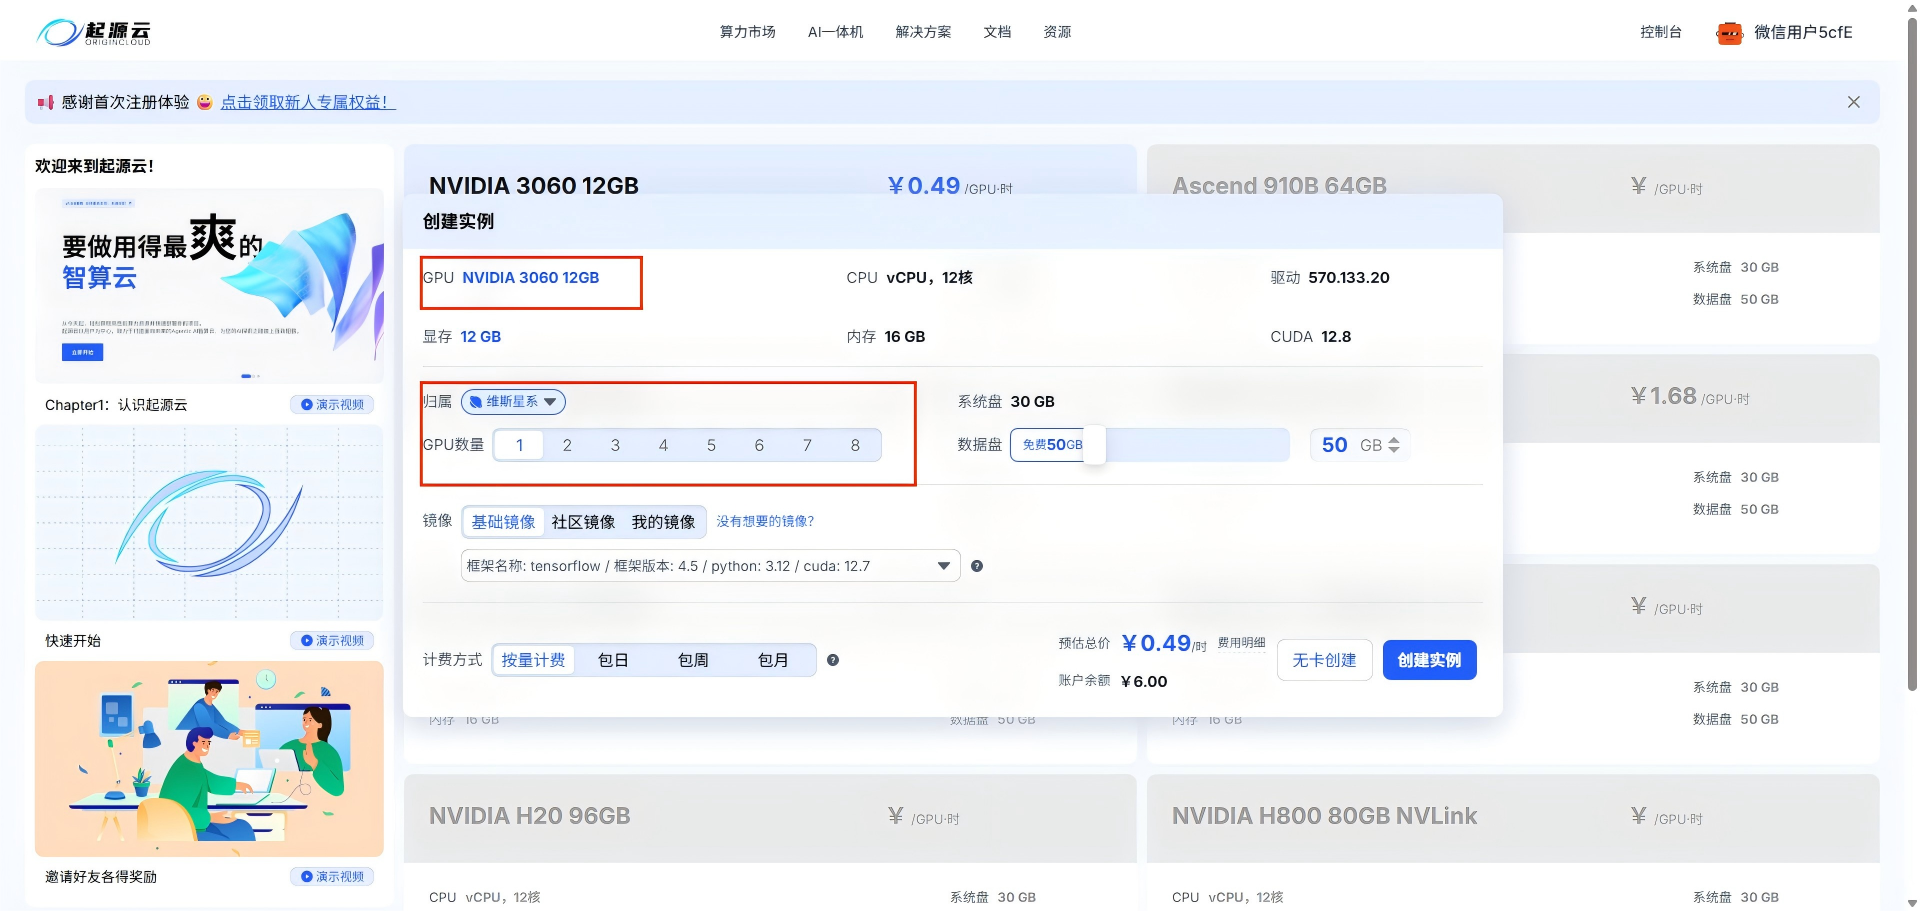
### 选择 GPU

直接选择你需要的 GPU 型号和数量。

<p align="center">
  <img src="https://mintcdn.com/oritime-ce96dd27/tgVeiLm4bSwlyb-9/images/select-gpu.png?fit=max&auto=format&n=tgVeiLm4bSwlyb-9&q=85&s=7f6be756fad43238970cb13ca2e9847e" alt="GPU 选择界面" width="800" data-path="images/select-gpu.png" />
</p>

不知道选哪个？根据任务需求选择合适的 GPU 型号。

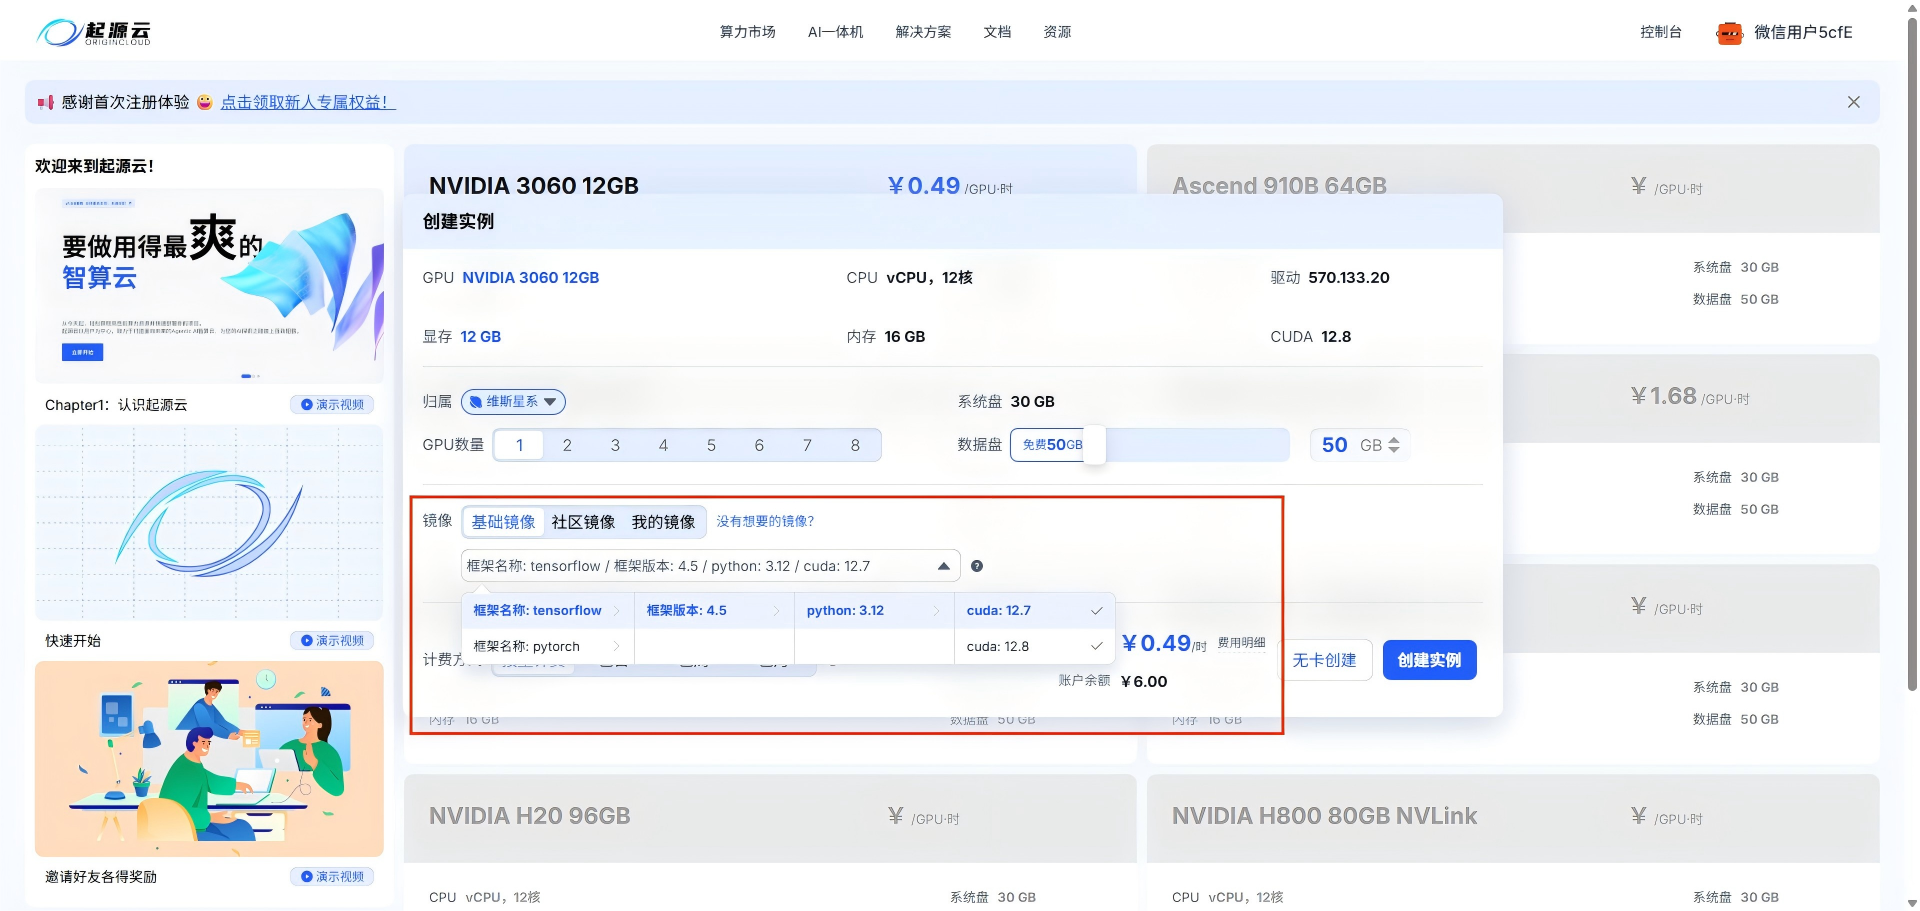
### 选择镜像

选择适合自己任务的镜像，也可以使用系统设置的默认镜像。

<p align="center">
  <img src="https://mintcdn.com/oritime-ce96dd27/tgVeiLm4bSwlyb-9/images/select-image.png?fit=max&auto=format&n=tgVeiLm4bSwlyb-9&q=85&s=9e92bf31bc285e39e64f99981ccba744" alt="镜像选择界面" width="800" data-path="images/select-image.png" />
</p>

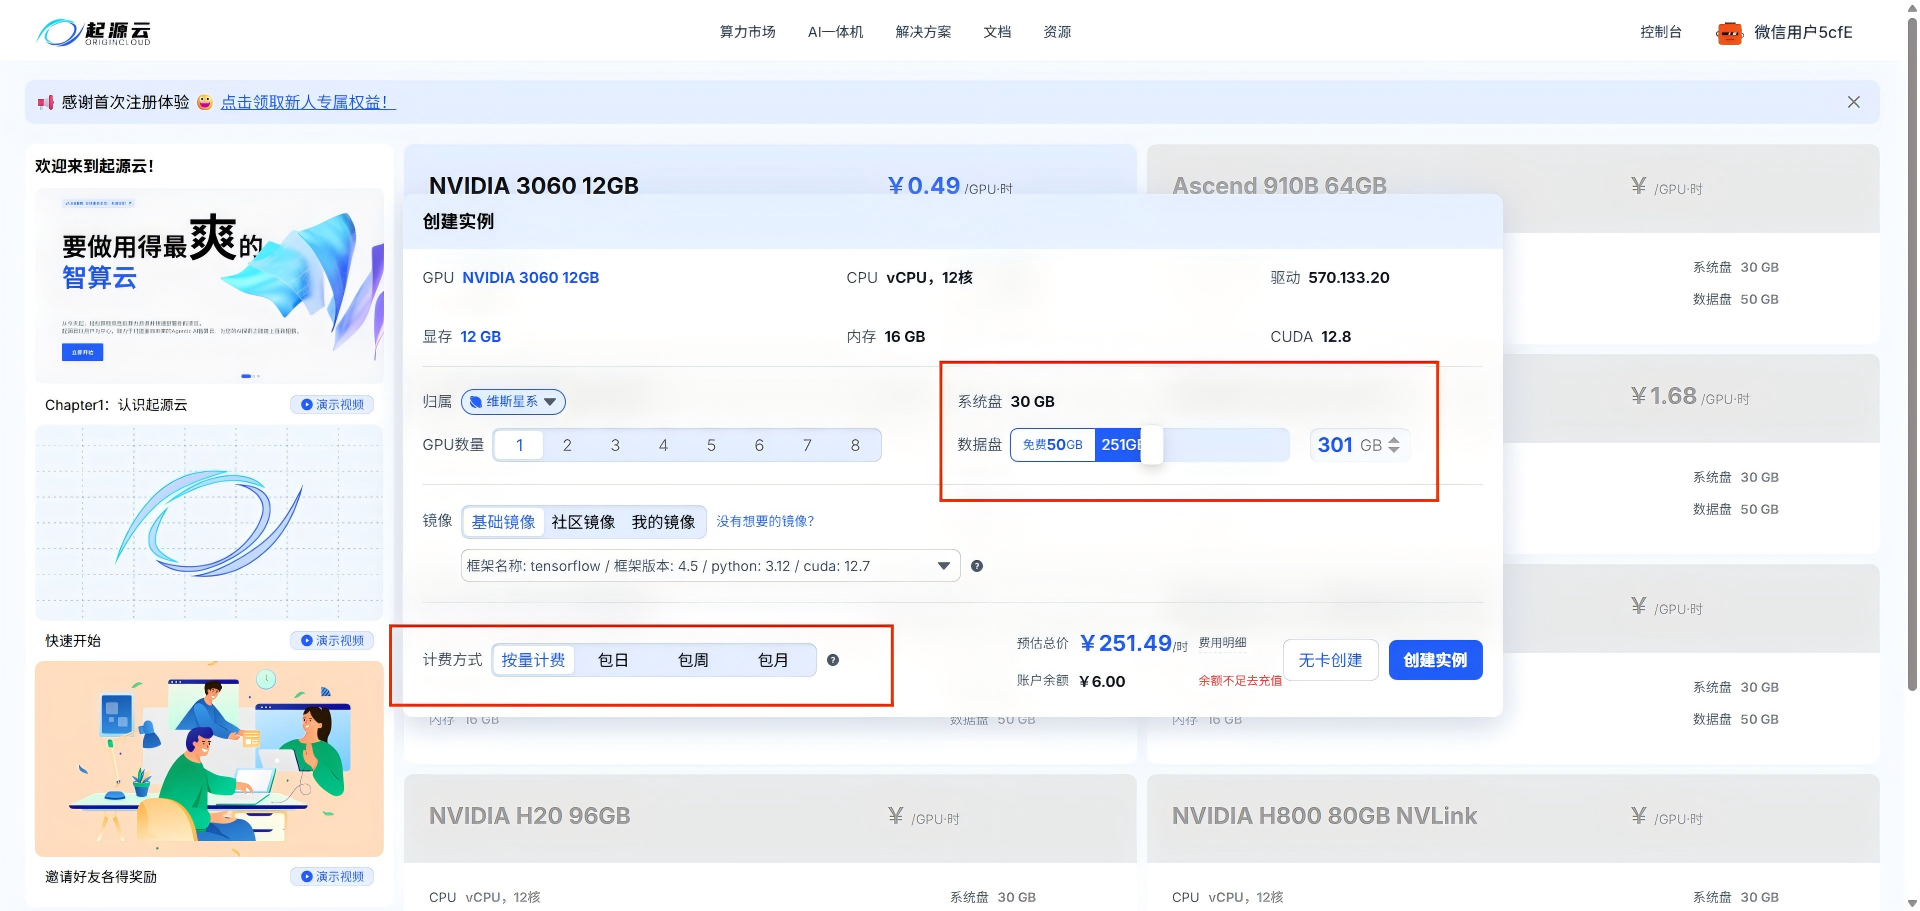
### 配置实例

* **数据盘**：根据数据集大小选择（可以后续在线扩容）
* **计费方式**：按量计费（按秒计费，关机即停止）/包日/包周/包月

<p align="center">
  <img src="https://mintcdn.com/oritime-ce96dd27/tgVeiLm4bSwlyb-9/images/configure-instance.png?fit=max&auto=format&n=tgVeiLm4bSwlyb-9&q=85&s=e22f792592d1ed08172ff48231f0822f" alt="配置界面" width="800" data-path="images/configure-instance.png" />
</p>

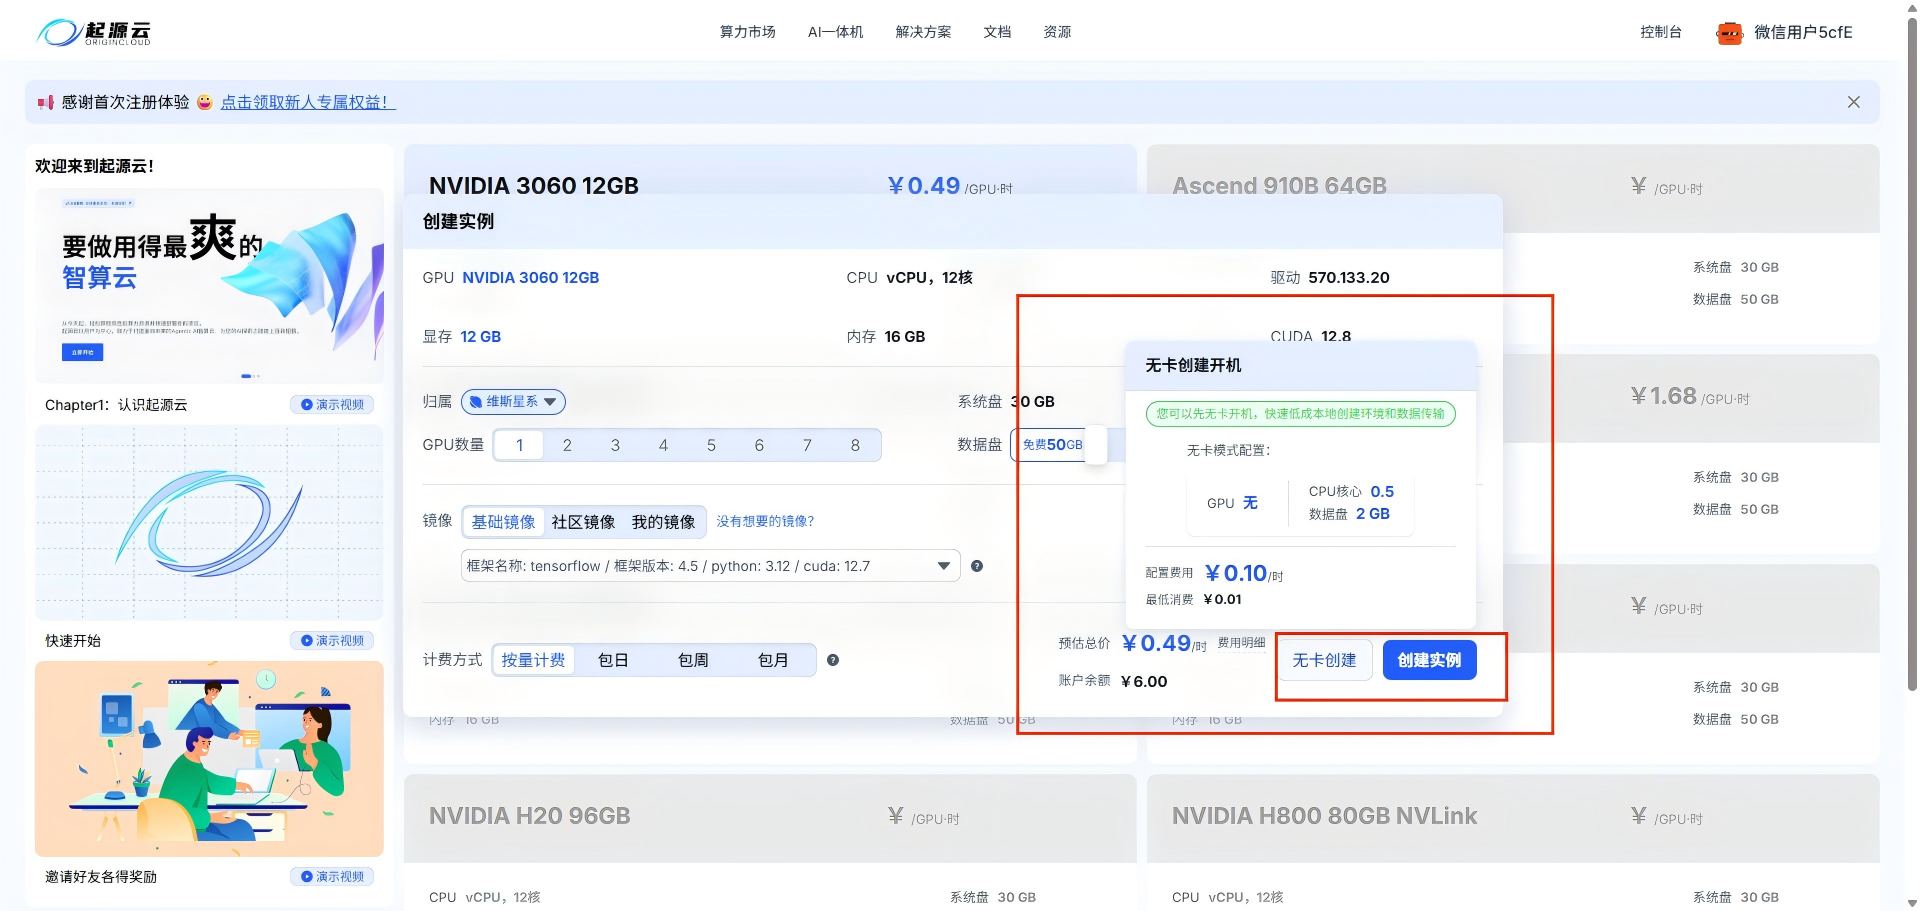
### 创建实例

确认配置后，点击"创建实例"。

系统会自动分配机器并开机，通常 30 秒内完成。若暂时没有用卡需求，可以选择“无卡开机”模式。

<p align="center">
  <img src="https://mintcdn.com/oritime-ce96dd27/tgVeiLm4bSwlyb-9/images/create-success.png?fit=max&auto=format&n=tgVeiLm4bSwlyb-9&q=85&s=c67d578fe31739f349563ef966203163" alt="创建成功提示" width="600" data-path="images/create-success.png" />
</p>

***

## 3. 连接实例

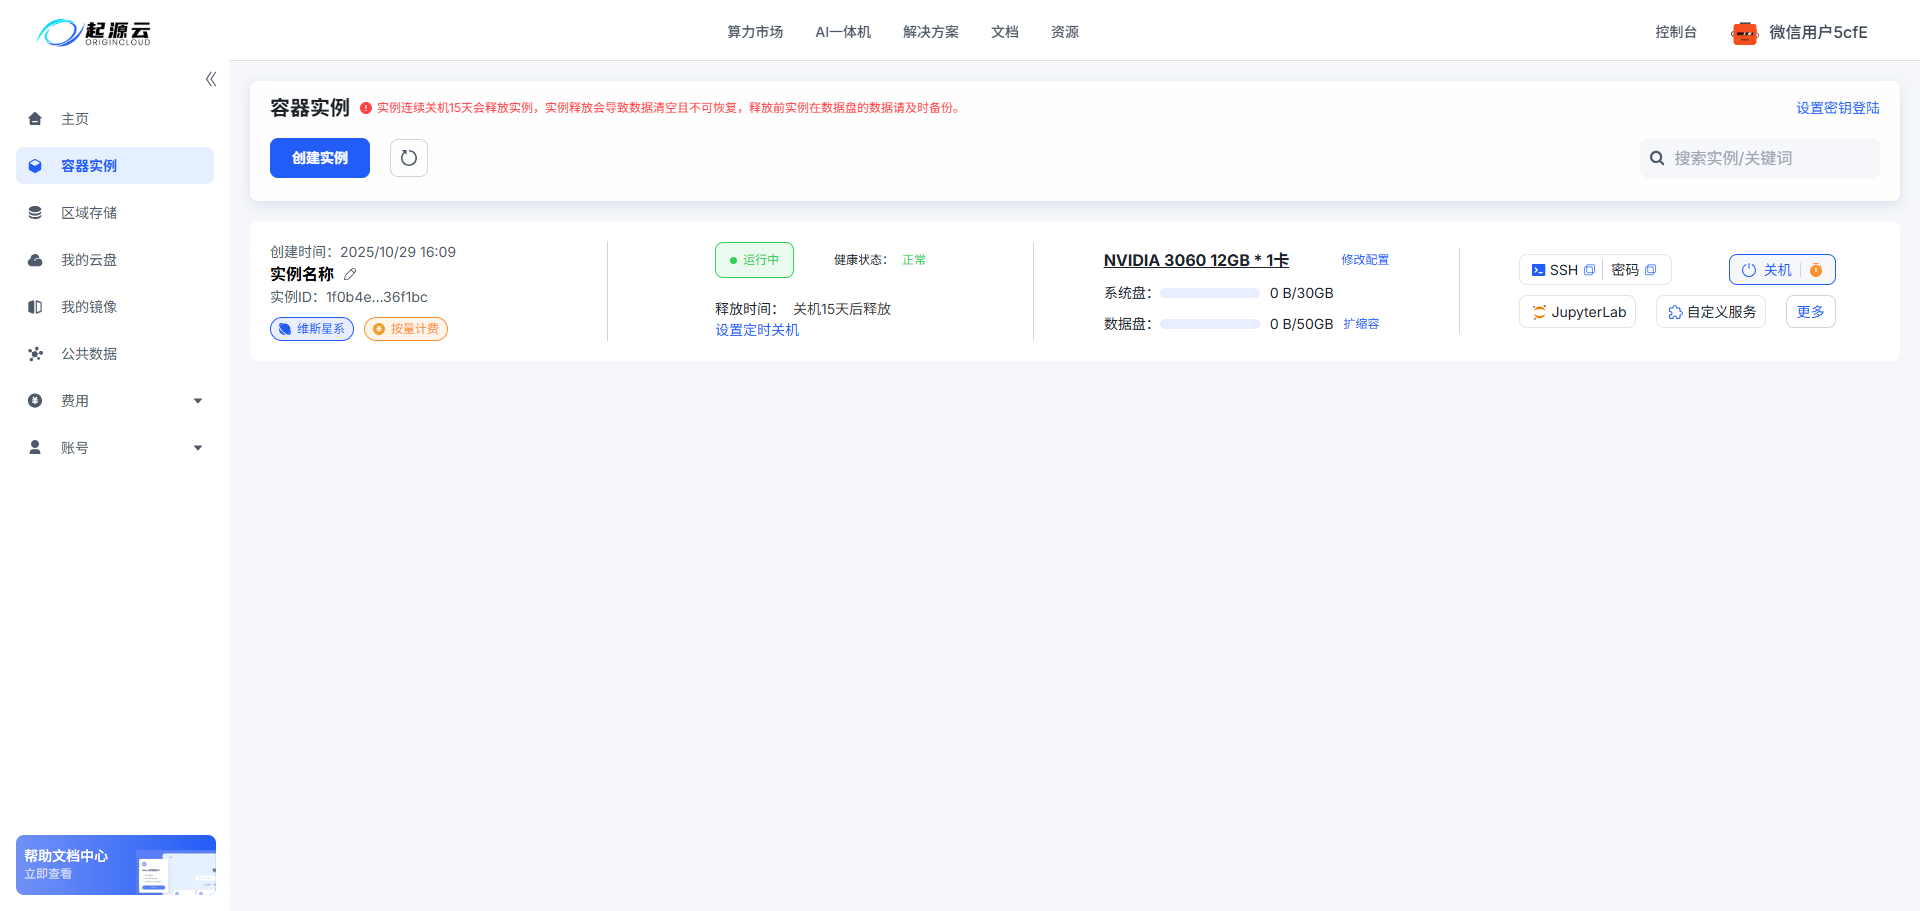
实例创建成功后，进入"实例容器"页面。

<p align="center">
  <img src="https://mintcdn.com/oritime-ce96dd27/tgVeiLm4bSwlyb-9/images/instance-list.png?fit=max&auto=format&n=tgVeiLm4bSwlyb-9&q=85&s=8177048cdc7abb0efd188325d4219c73" alt="实例列表" width="800" data-path="images/instance-list.png" />
</p>

起源云支持三种连接方式：

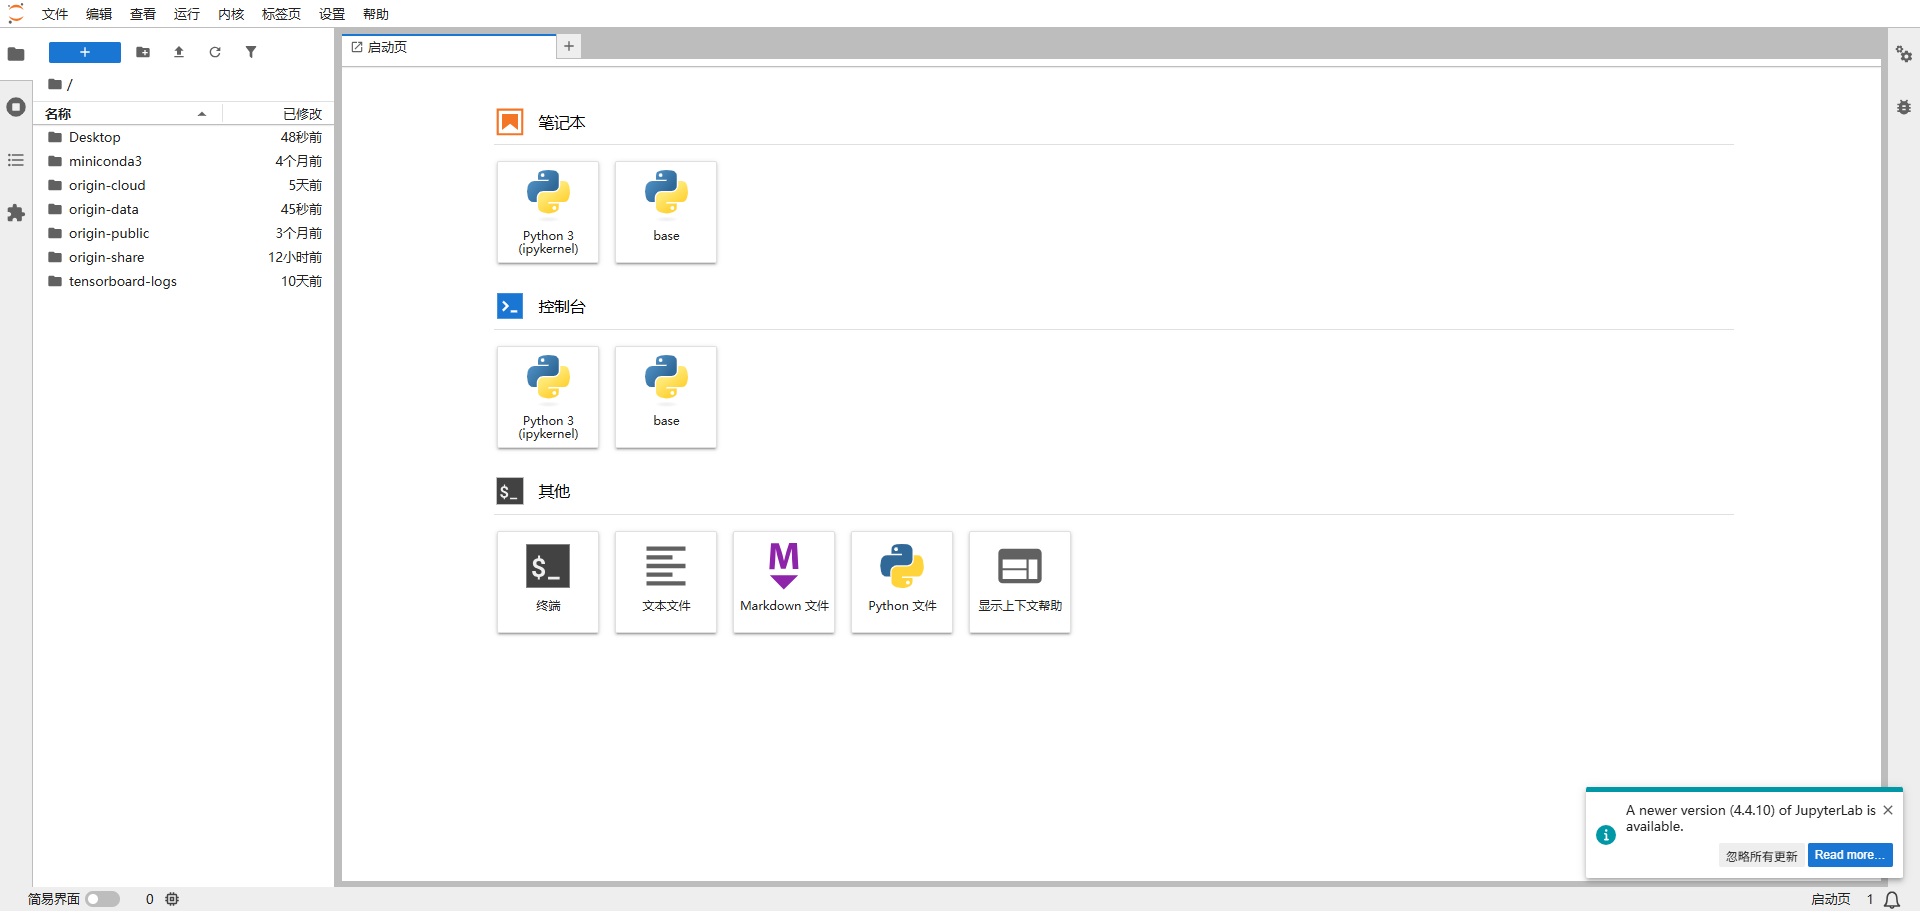
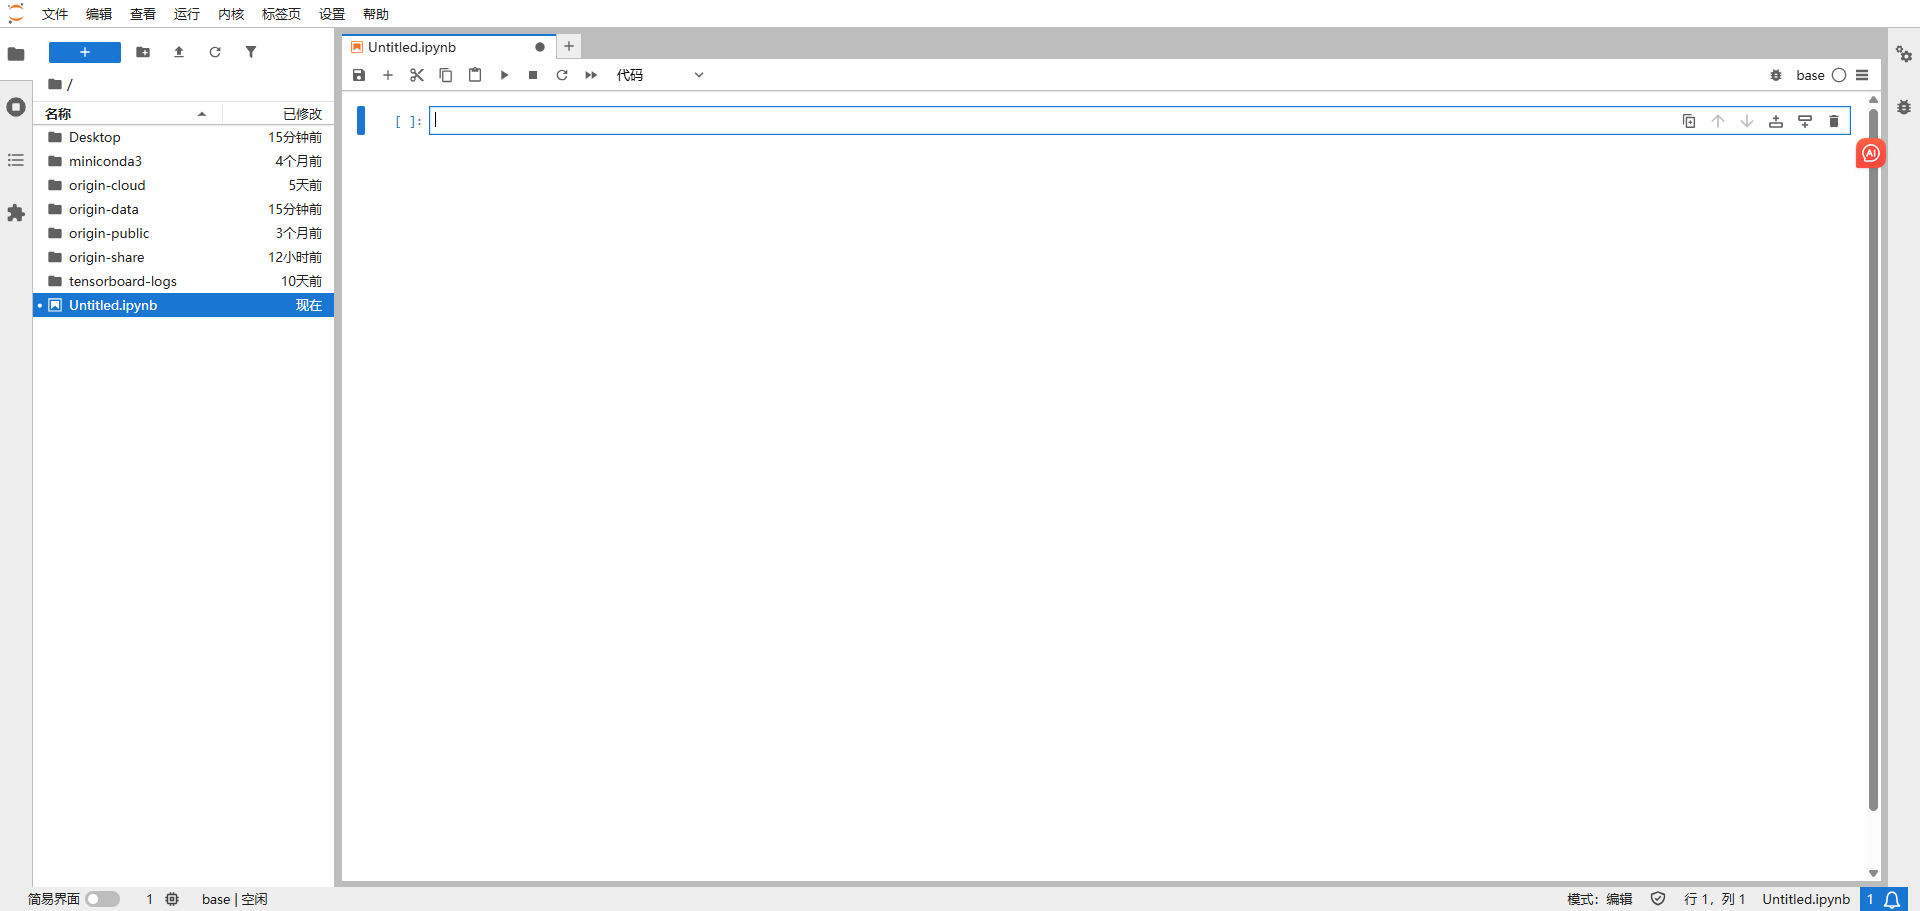
### JupyterLab（推荐新手）

点击实例右侧的"JupyterLab"按钮，浏览器自动打开。

<p align="center">
  <img src="https://mintcdn.com/oritime-ce96dd27/tgVeiLm4bSwlyb-9/images/jupyterlab1.png?fit=max&auto=format&n=tgVeiLm4bSwlyb-9&q=85&s=8aee967a2edc2b3a85272f6e7cc1688f" alt="JupyterLab 界面1" width="800" data-path="images/jupyterlab1.png" />
</p>

<p align="center">
  <img src="https://mintcdn.com/oritime-ce96dd27/tgVeiLm4bSwlyb-9/images/jupyterlab2.png?fit=max&auto=format&n=tgVeiLm4bSwlyb-9&q=85&s=18099819c9307111fa1951fb9e57e590" alt="JupyterLab 界面2" width="800" data-path="images/jupyterlab2.png" />
</p>

详细教程：[JupyterLab 使用指南](/dev-tools/jupyter)

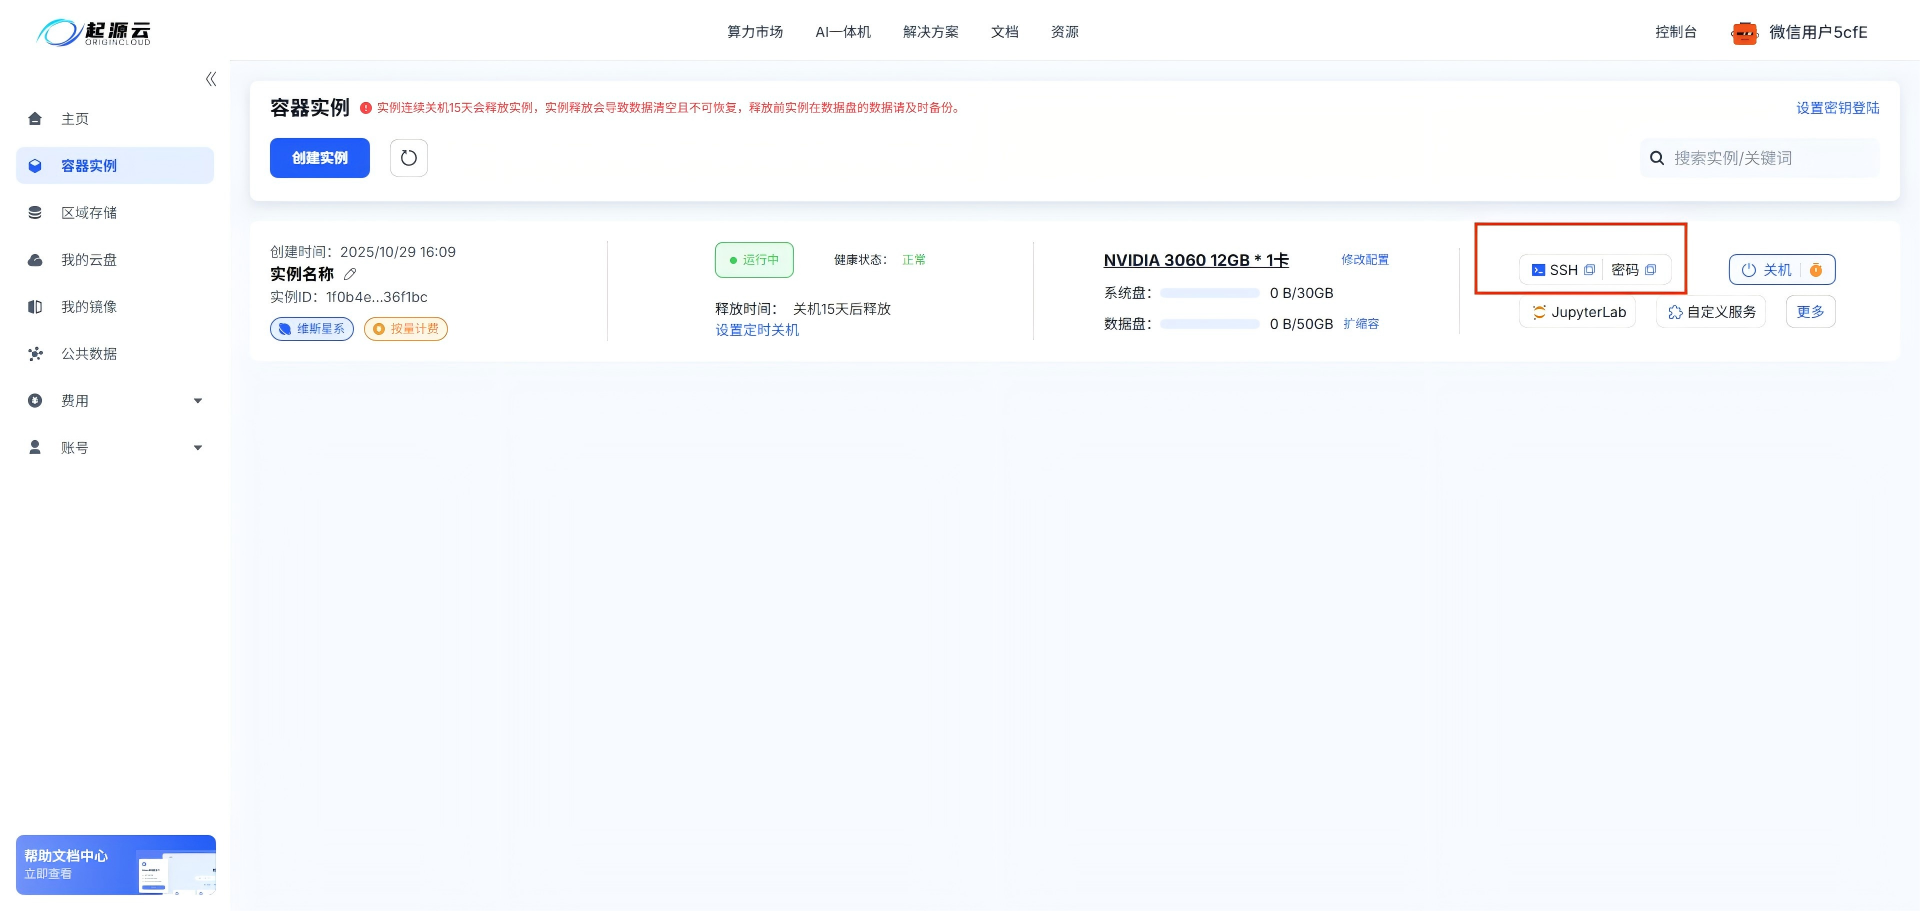
### SSH 连接

点击实例的"操作" → "登录指令"，复制 SSH 命令。

<p align="center">
  <img src="https://mintcdn.com/oritime-ce96dd27/tgVeiLm4bSwlyb-9/images/ssh-copy.png?fit=max&auto=format&n=tgVeiLm4bSwlyb-9&q=85&s=b289a90d2e4078fa7060eeca092963fa" alt="ssh复制" width="600" data-path="images/ssh-copy.png" />
</p>

在本地终端粘贴并回车：

```bash theme={null}
ssh root@<实例IP> -p <端口>
# 输入密码（密码在登录指令中）
```

详细教程：[SSH 连接指南](/instances/connect#ssh)

### VNC 虚拟桌面

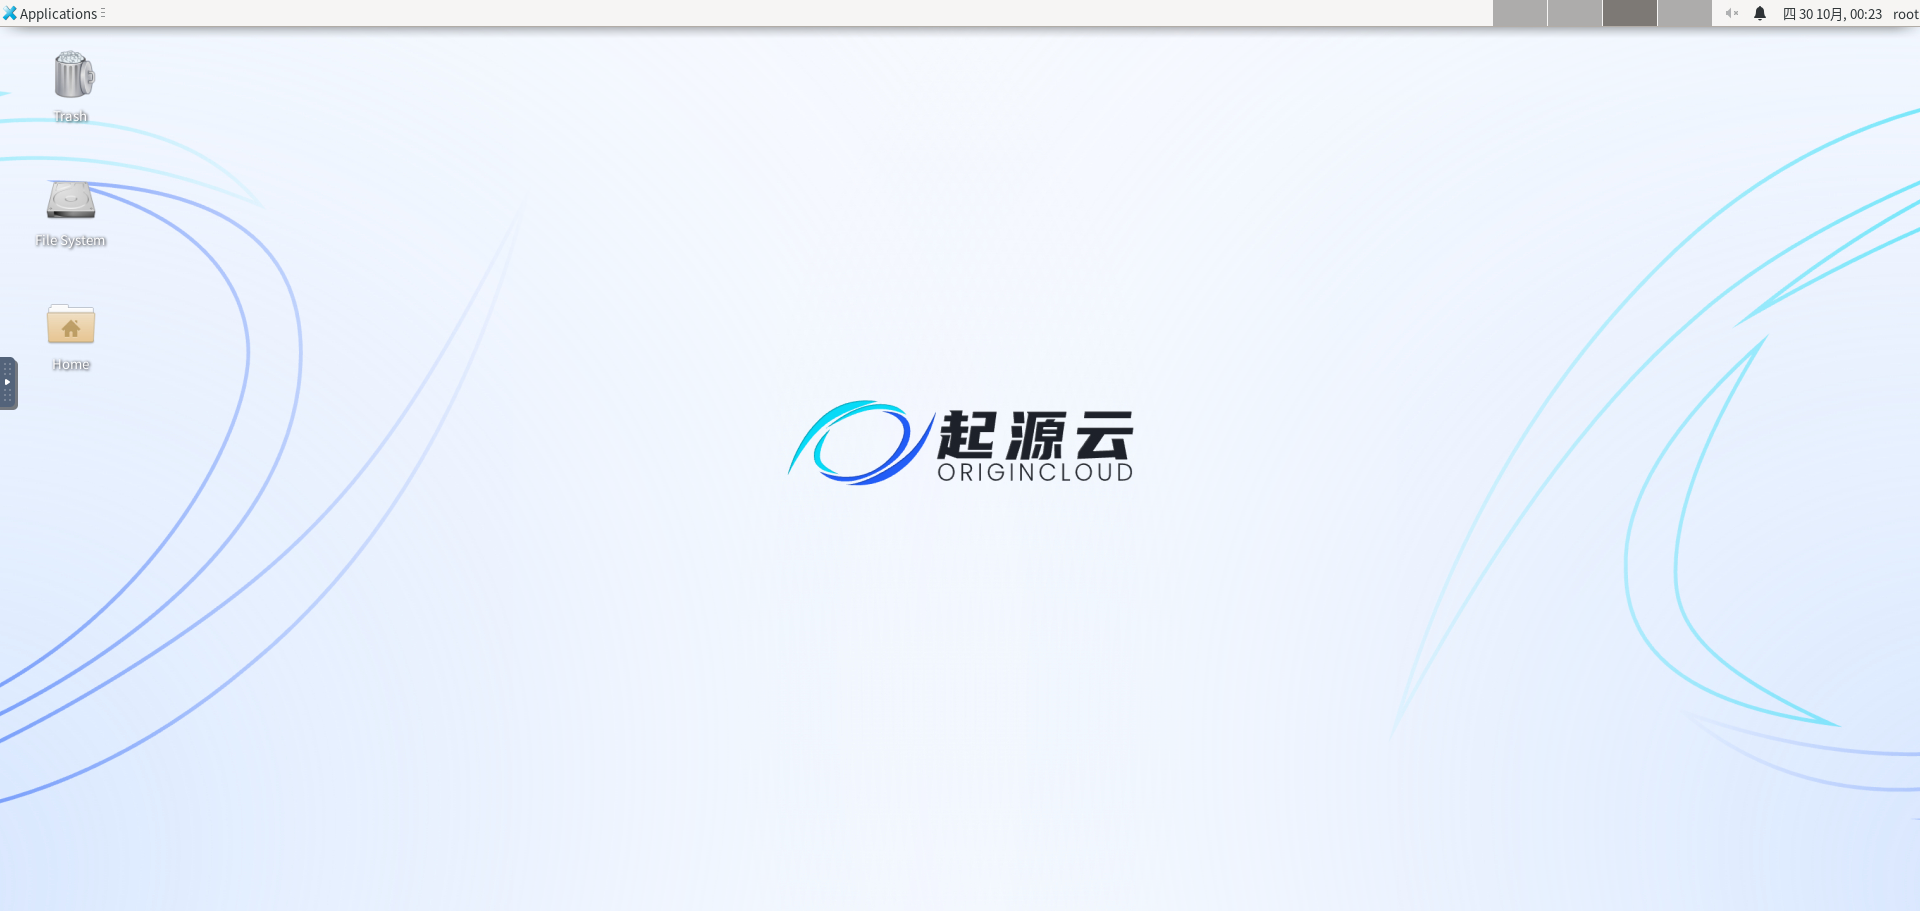
点击实例右侧"更多"找到"VNC"按钮。
<p align="center">
  <img src="https://mintcdn.com/oritime-ce96dd27/tgVeiLm4bSwlyb-9/images/vnc.png?fit=max&auto=format&n=tgVeiLm4bSwlyb-9&q=85&s=1016b750e71dec93c6ee09f8ee91d736" alt="虚拟桌面" width="600" data-path="images/vnc.png" />
</p>

详细教程：[VNC 连接指南](/instances/connect#vnc)

***

## 4. 存储与数据上传

起源云提供多种存储空间，每种有不同的用途和访问方式。

### 存储空间说明

起源云的实例有以下几种存储空间：

| 存储类型       | 路径                    | 容量       | 特点                |
| ---------- | --------------------- | -------- | ----------------- |
| **系统盘**    | `/`                   | 30GB     | 存放系统、软件、代码，随镜像保存  |
| **数据盘**    | `/root/origin-data`   | 可扩展      | 存放数据集和模型，支持在线扩容   |
| **起源云盘** ⭐ | `/root/origin-cloud`  | 不限       | 跨实例共享，实例释放后数据永久保留 |
| **区域存储**   | `/root/origin-share`  | 20-200GB | 同区域实例共享，访问速度快     |
| **公共数据**   | `/root/origin-public` | -        | 常用数据集，只读          |

详细说明：[存储系统概述](/storage/overview)

***

### 数据上传方式

根据数据大小和使用场景，选择合适的上传方式：

#### 方式 1：JupyterLab 网页上传

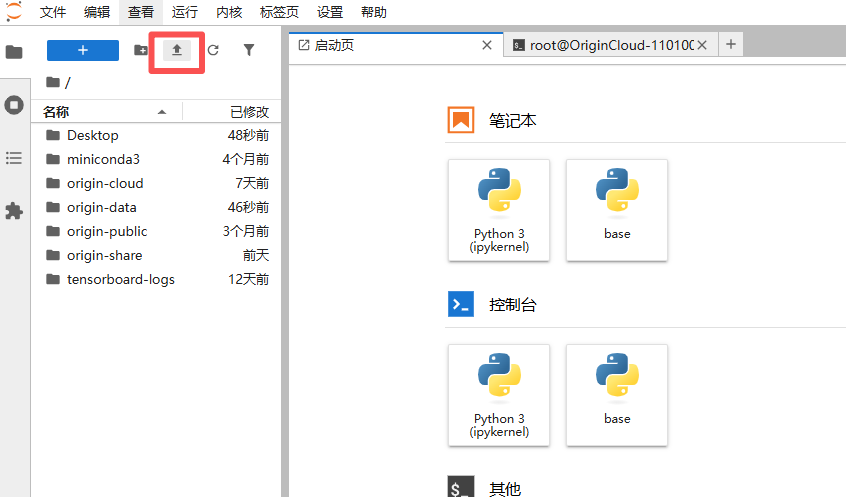
直接在 JupyterLab 中上传文件到系统盘或数据盘。

1. 打开 JupyterLab
2. 点击左上角"上传文件"按钮
3. 选择文件上传
<p align="center">
  <img src="https://mintcdn.com/oritime-ce96dd27/0fF3bGt6kbldZDJN/images/jupyterlab-upload.png?fit=max&auto=format&n=0fF3bGt6kbldZDJN&q=85&s=3f67090f066ea8d2a7c1d4e9a072c6ab" alt="JupyterLab 上传" width="700" data-path="images/jupyterlab-upload.png" />
</p>

**适合**：小文件（\< 1GB），临时数据

***

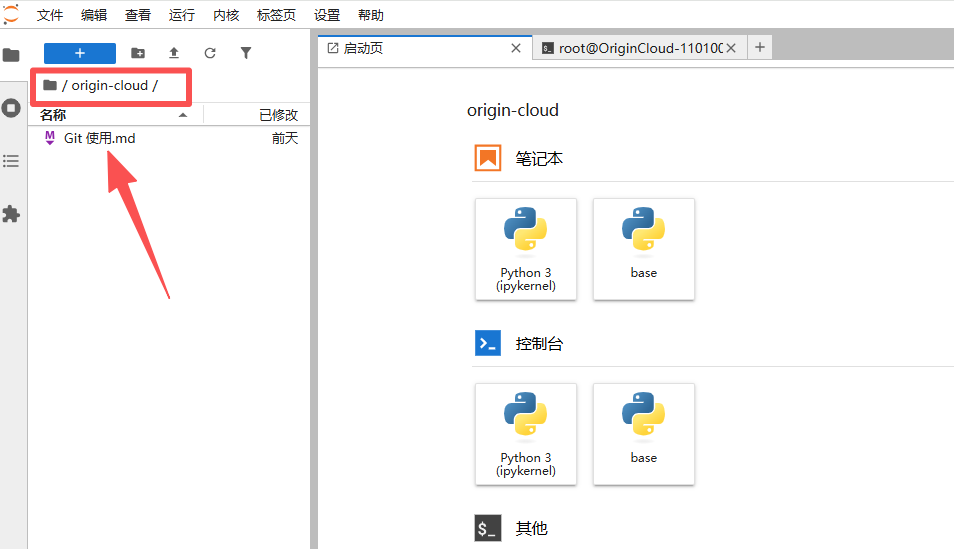
#### 方式 2：起源云盘网页上传

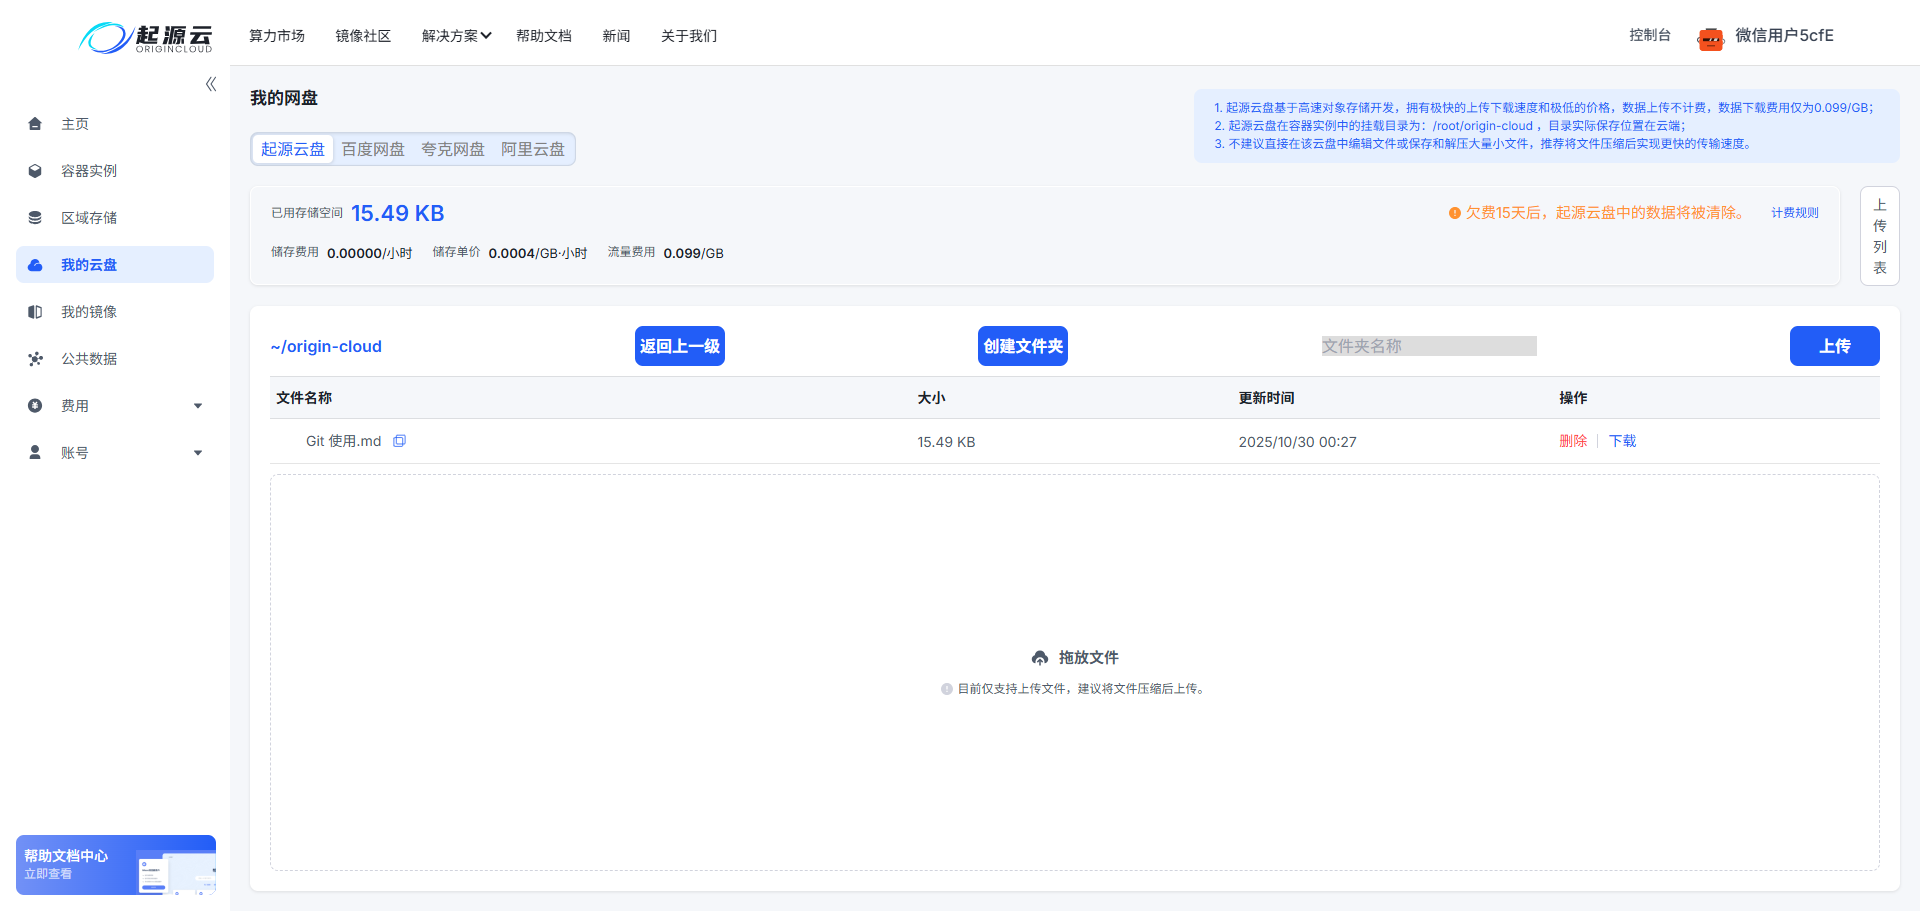
**推荐！** 一次上传，所有实例都能用。

1. 左侧导航栏 → 我的云盘
2. 点击"上传文件"
3. 文件自动挂载到所有实例的 `/root/origin-cloud` 目录
<p align="center">
  <img src="https://mintcdn.com/oritime-ce96dd27/0fF3bGt6kbldZDJN/images/origin-disk-upload.png?fit=max&auto=format&n=0fF3bGt6kbldZDJN&q=85&s=bb083e6cee5a1f87461bdbcd989fe968" alt="起源云盘上传" width="800" data-path="images/origin-disk-upload.png" />
</p>

<p align="center">
  <img src="https://mintcdn.com/oritime-ce96dd27/0fF3bGt6kbldZDJN/images/origin-disk-upload2.png?fit=max&auto=format&n=0fF3bGt6kbldZDJN&q=85&s=e461b959064c3449ccb97c58763b73c3" alt="云盘挂载" width="800" data-path="images/origin-disk-upload2.png" />
</p>

**适合**：常用数据集、模型文件、需要长期保存的数据

详细教程：[起源云盘使用指南](/storage/origin-disk)

***

#### 方式 3：区域存储网页上传

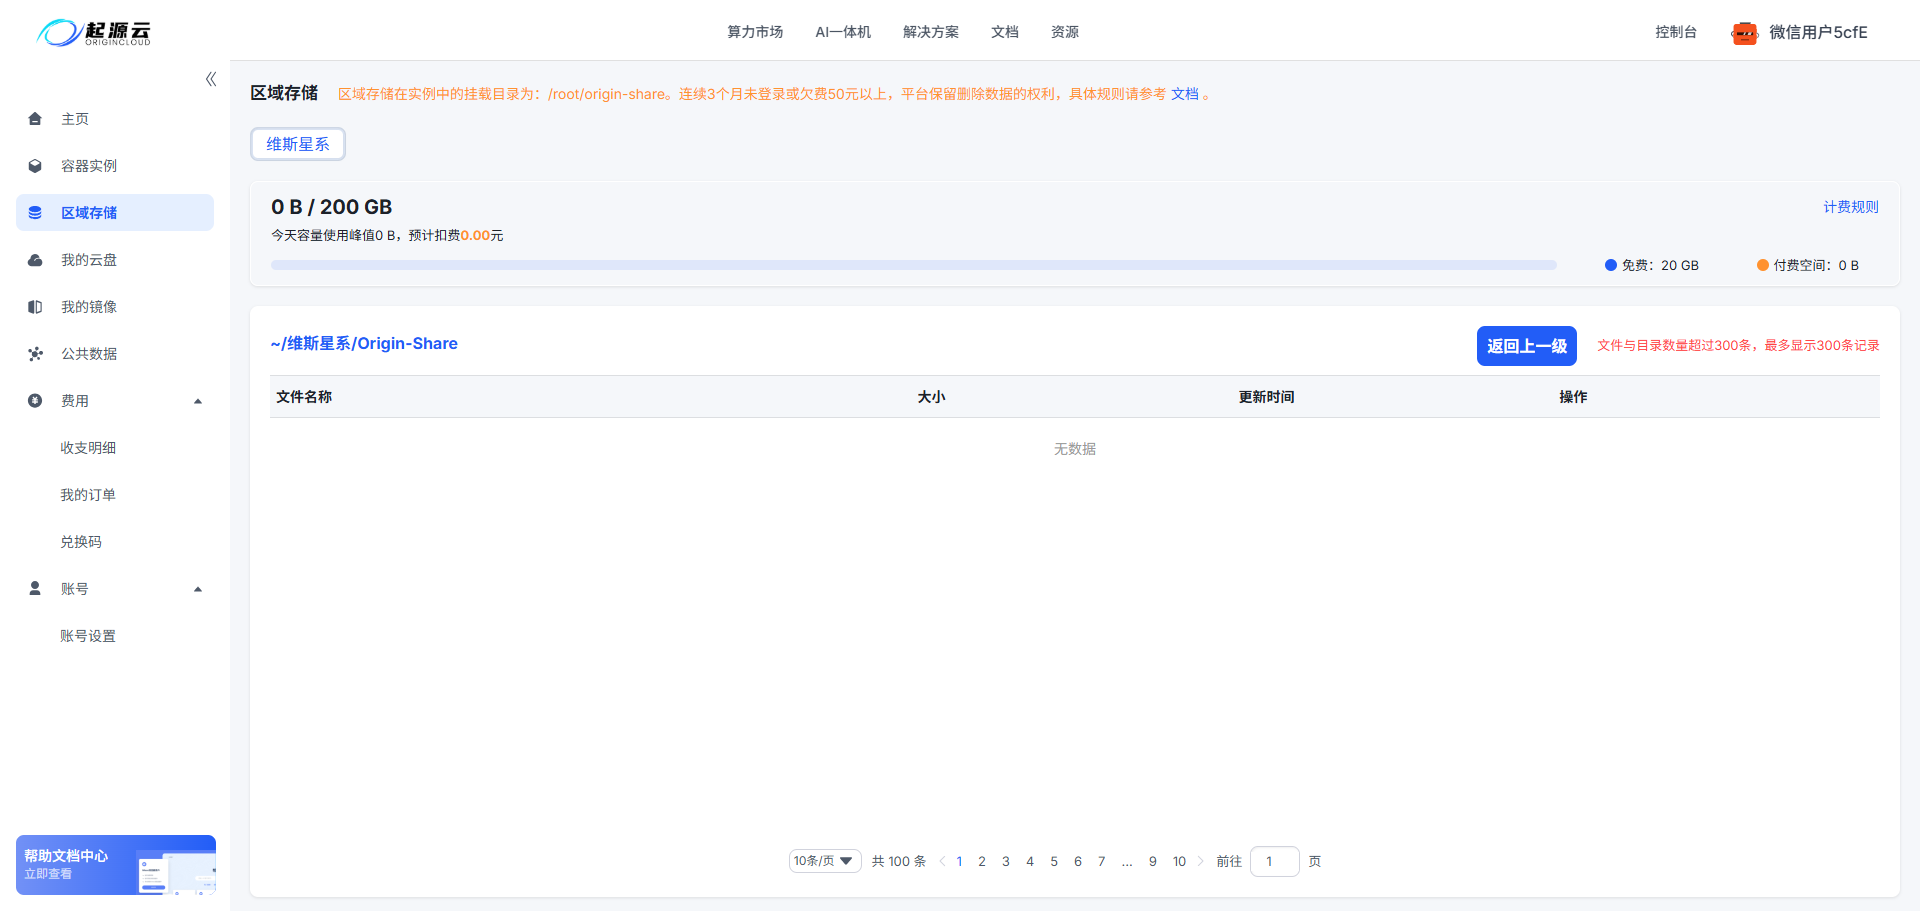
同区域实例间共享数据，访问速度快。

1. 左侧导航栏 → 区域存储
2. 点击"上传文件"
3. 文件自动挂载到同区域实例的 `/root/origin-share` 目录
<p align="center">
  <img src="https://mintcdn.com/oritime-ce96dd27/0fF3bGt6kbldZDJN/images/region-storage-upload.png?fit=max&auto=format&n=0fF3bGt6kbldZDJN&q=85&s=bf8e1270c18b62080c178f278213ee77" alt="区域存储上传" width="800" data-path="images/region-storage-upload.png" />
</p>

**适合**：同区域多实例共享的数据集

***

#### 方式 4：SCP 传输

```bash theme={null}
# 上传文件到数据盘
scp -P <端口> /local/path/file.zip root@<实例IP>:/root/origin-data/

# 上传文件夹
scp -r -P <端口> /local/path/folder root@<实例IP>:/root/origin-data/
```

**适合**：大文件（> 10GB），批量文件

详细教程：[数据传输指南](/storage/upload-download)

***

## 5. 运行训练

数据准备好后，开始训练！

### 在 JupyterLab 中

创建一个新的 Notebook，运行你的训练代码：

```python theme={null}
import torch

# 1. 确认 GPU 可用
device = torch.device("cuda" if torch.cuda.is_available() else "cpu")
print(f"使用设备: {device}")

# 2. 加载数据
train_loader = load_your_data()

# 3. 定义模型
model = YourModel().to(device)

# 4. 训练
for epoch in range(epochs):
    for data, target in train_loader:
        data, target = data.to(device), target.to(device)
        output = model(data)
        loss = criterion(output, target)
        loss.backward()
        optimizer.step()
    print(f'Epoch {epoch} 完成')

# 5. 保存模型到数据盘
torch.save(model.state_dict(), '/root/origin-data/model.pth')
```

### 通过 SSH 后台运行（推荐长时间训练）

```bash theme={null}
# 后台运行训练脚本
nohup python train.py > train.log 2>&1 &

# 查看训练日志
tail -f train.log
```

**优势**：即使关闭 SSH 连接，训练也会继续运行。

***

## 6. 关闭实例

### 关机

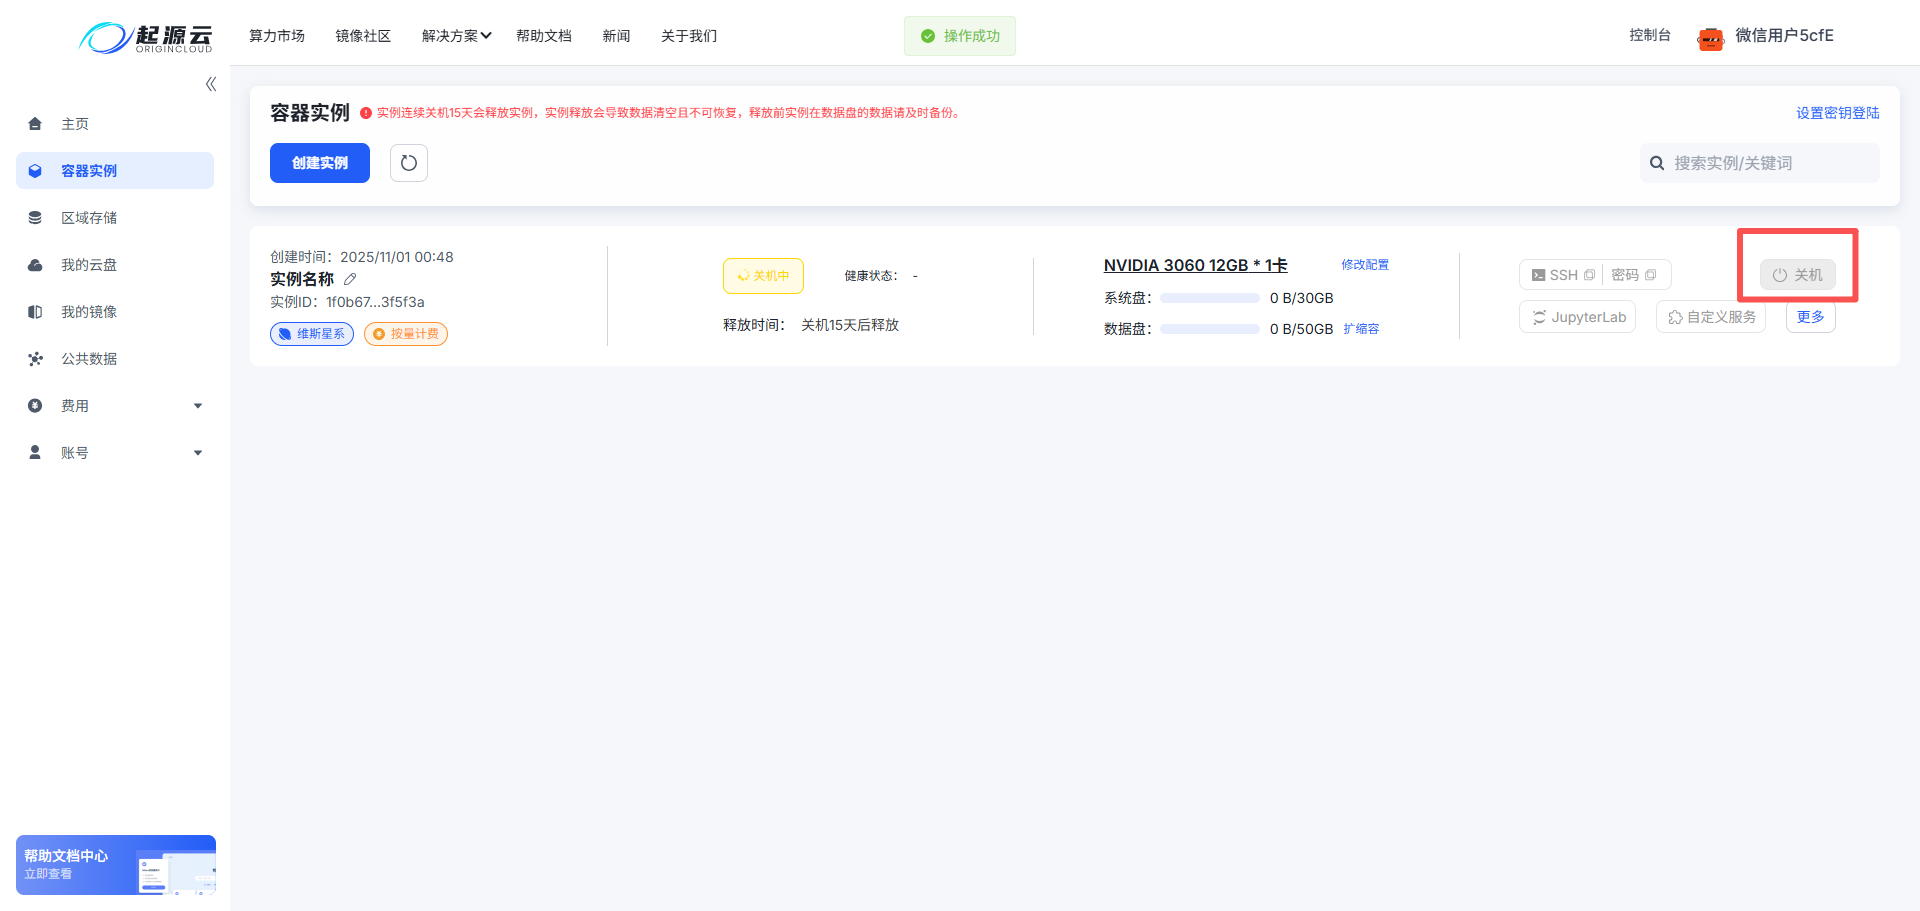
训练完成或暂时不用时，点击"关机"。

**关机后**：
立即停止计费，数据保留（系统盘 + 数据盘）。

<p align="center">
  <img src="https://mintcdn.com/oritime-ce96dd27/0fF3bGt6kbldZDJN/images/shutdown-button.png?fit=max&auto=format&n=0fF3bGt6kbldZDJN&q=85&s=c25be11e4b63e010acace5ebd2d4bf3d" alt="关机按钮" width="600" data-path="images/shutdown-button.png" />
</p>

**注意**：连续关机 15 天后，系统会自动释放实例。

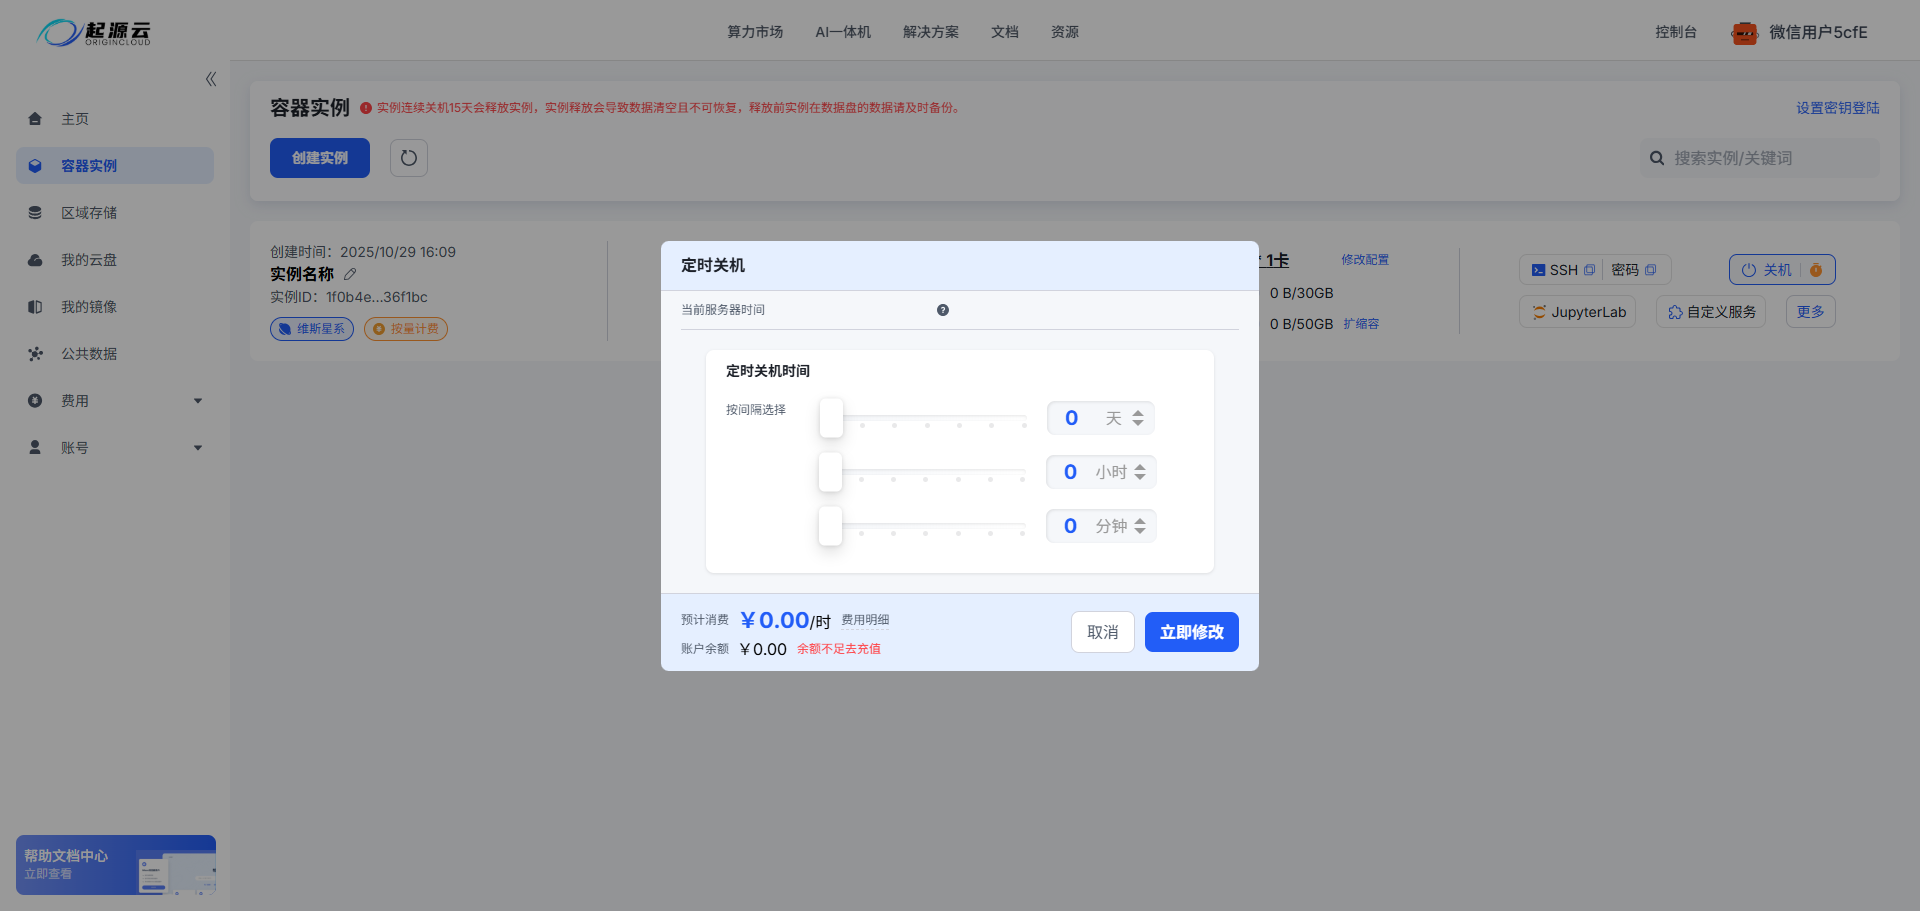
### 定时关机

点击"定时关机"，选择时间，到点自动关机。

<p align="center">
  <img src="https://mintcdn.com/oritime-ce96dd27/tgVeiLm4bSwlyb-9/images/auto-shutdown.png?fit=max&auto=format&n=tgVeiLm4bSwlyb-9&q=85&s=06e99b6fb46611bcdb3b8f64176a8168" alt="定时关机设置" width="600" data-path="images/auto-shutdown.png" />
</p>

详细教程：[定时关机设置](/instances/auto-shutdown)

***

***

## 进阶功能

掌握基础流程后，可以探索这些高级功能：

<CardGroup cols={2}>
  <Card title="无卡创建" icon="circle-dashed" href="/instances/cardless-creation">
    先准备环境，再添加 GPU，节省费用
  </Card>

  <Card title="在线升降配" icon="arrows-up-down" href="/instances/upgrade-downgrade">
    运行中调整 GPU 数量和配置，无需关机
  </Card>

  <Card title="数据盘扩容" icon="expand" href="/storage/data-disk">
    运行中直接扩容，立即生效
  </Card>

  <Card title="AI 终端" icon="robot" href="/ai-dev/terminal">
    智能错误诊断，自动解决问题
  </Card>
</CardGroup>

如有问题，详见[常见问题解答](/troubleshooting/faq)

***

## 下一步

恭喜！你已经掌握了起源云的基本使用。

<CardGroup cols={2}>
  <Card title="为什么选起源云" icon="star" href="/getting-started/why-choose-origincloud">
    了解 11 个差异化功能
  </Card>

  <Card title="存储系统" icon="database" href="/storage/overview">
    了解数据盘、起源云盘等存储方案
  </Card>

  <Card title="连接实例详解" icon="terminal" href="/instances/connect">
    SSH、VSCode、端口转发等高级用法
  </Card>

  <Card title="计费说明" icon="coins" href="/getting-started/pricing">
    了解计费规则和省钱技巧
  </Card>
</CardGroup>